
Quick Links
What is a Jabberwocky?

The Jabberwocky Keyboard product line is a series of full-size columnar-staggered mechanical keyboards that combine multiple design elements for ergonomics or convenience. The Jabberwocky layout iterates upon the design of the Boardrun Bizarre, a keyboard designed by Shensmobile.
The name was chosen as an indirect reference to the Alice semi-split keyboard layout by way of Lewis Carroll, author of Alice’s Adventures in Wonderland and the poem “Jabberwocky.”
The Jabberwocky layouts, PCBs, and DIY kits were designed by NoPunIn10Did. The Jabberwocky CNC Edition case was designed by hali.
Case Options
I am currently selling Jabberwocky DIY kits and PCBs in-stock, and I am taking refundable deposits to reserve the aluminum CNC edition (which is already in production).
Acrylic sandwich case designs are also available, but I will not be providing those personally.
Order Form for Purchases & Reservations
Dexterous or Sinister?

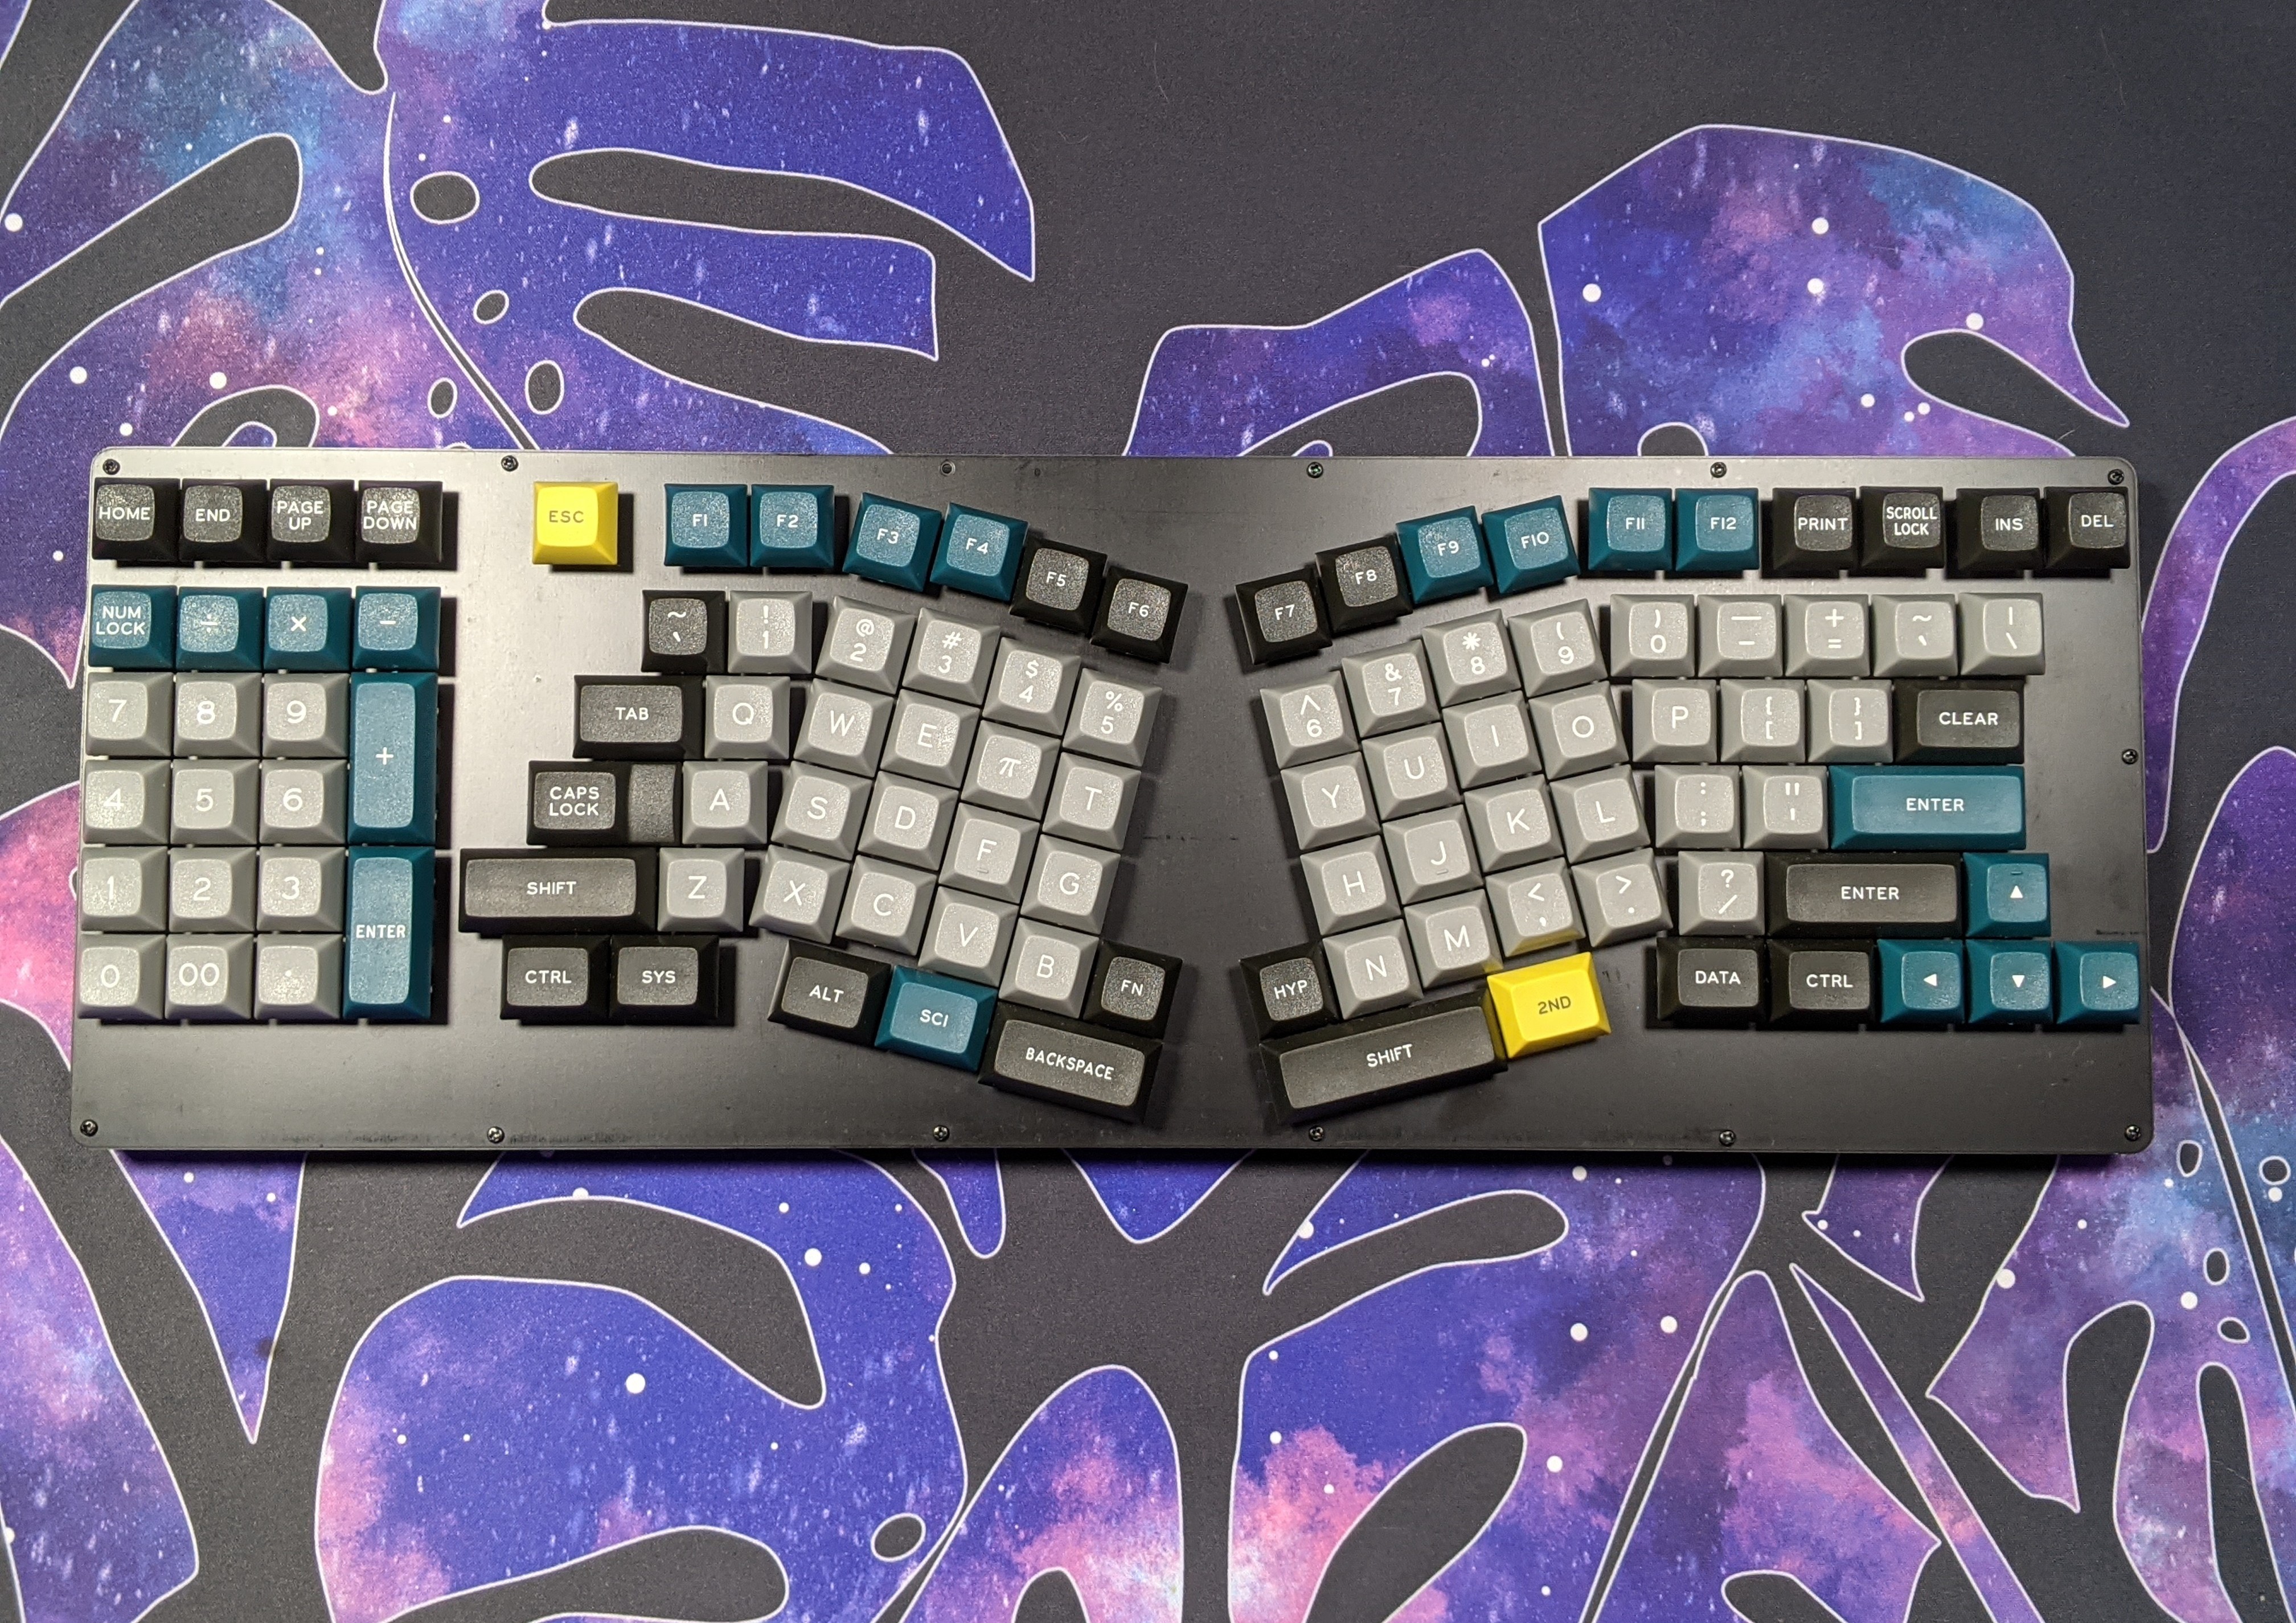
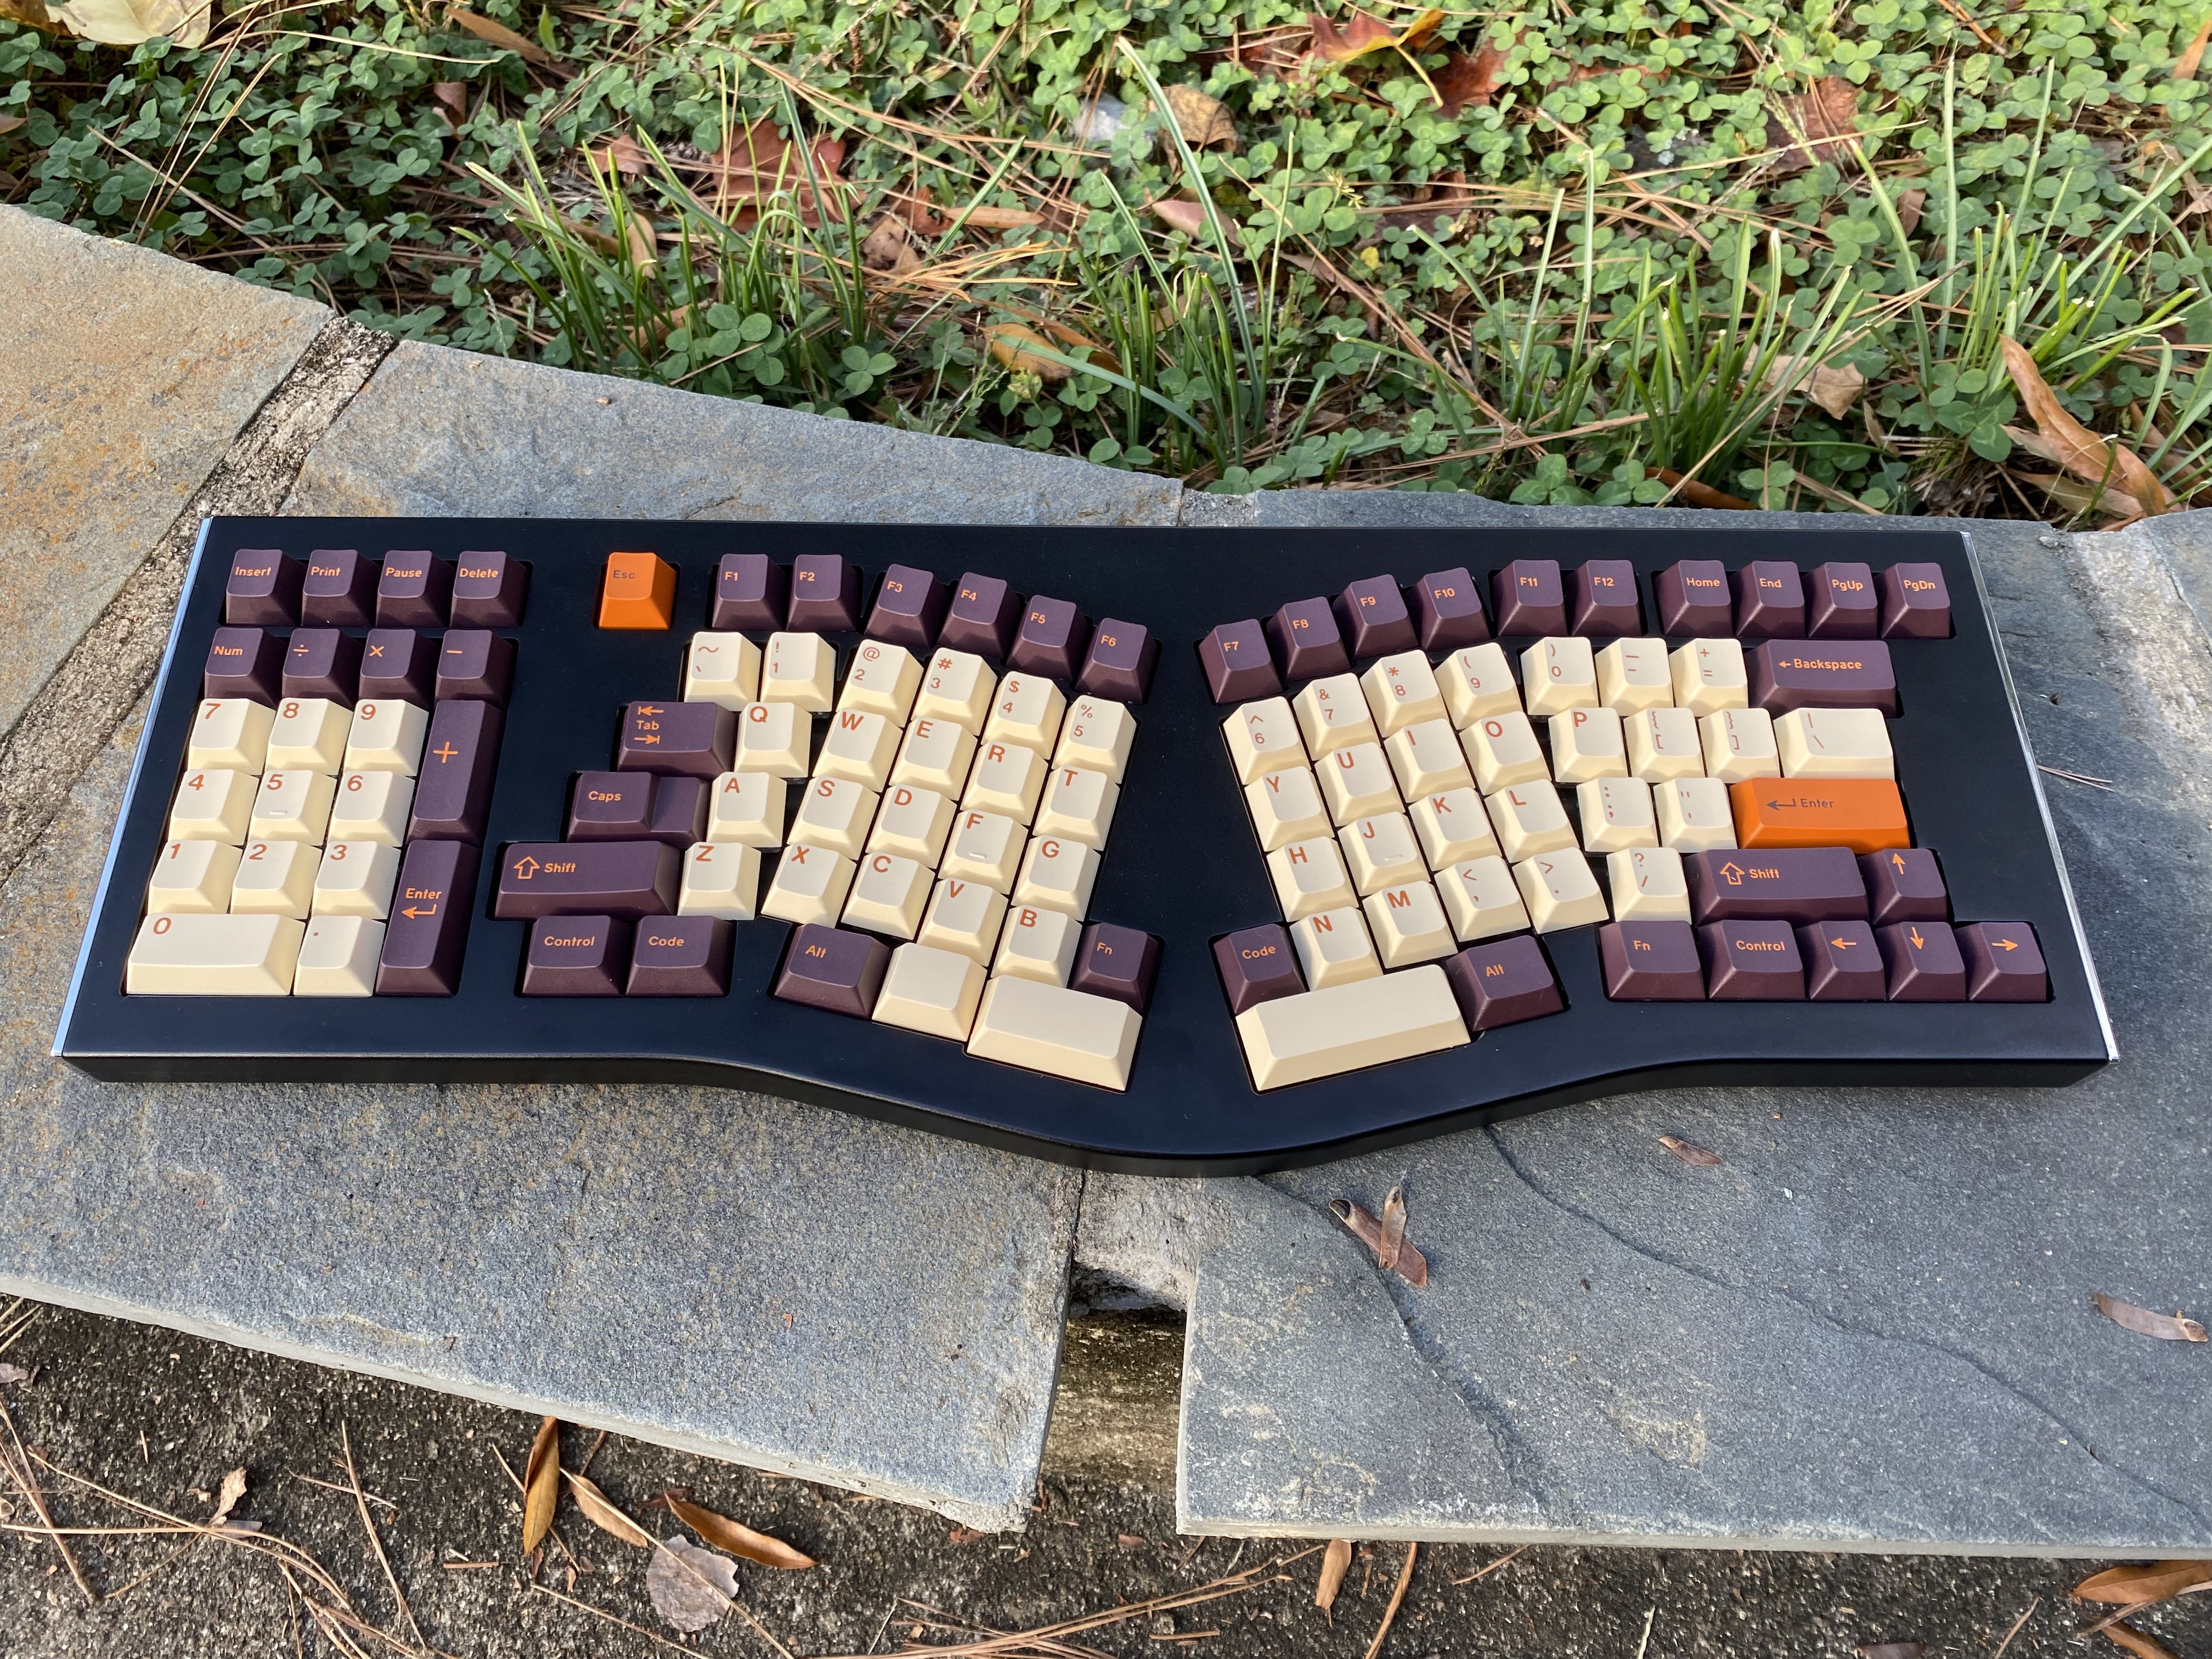
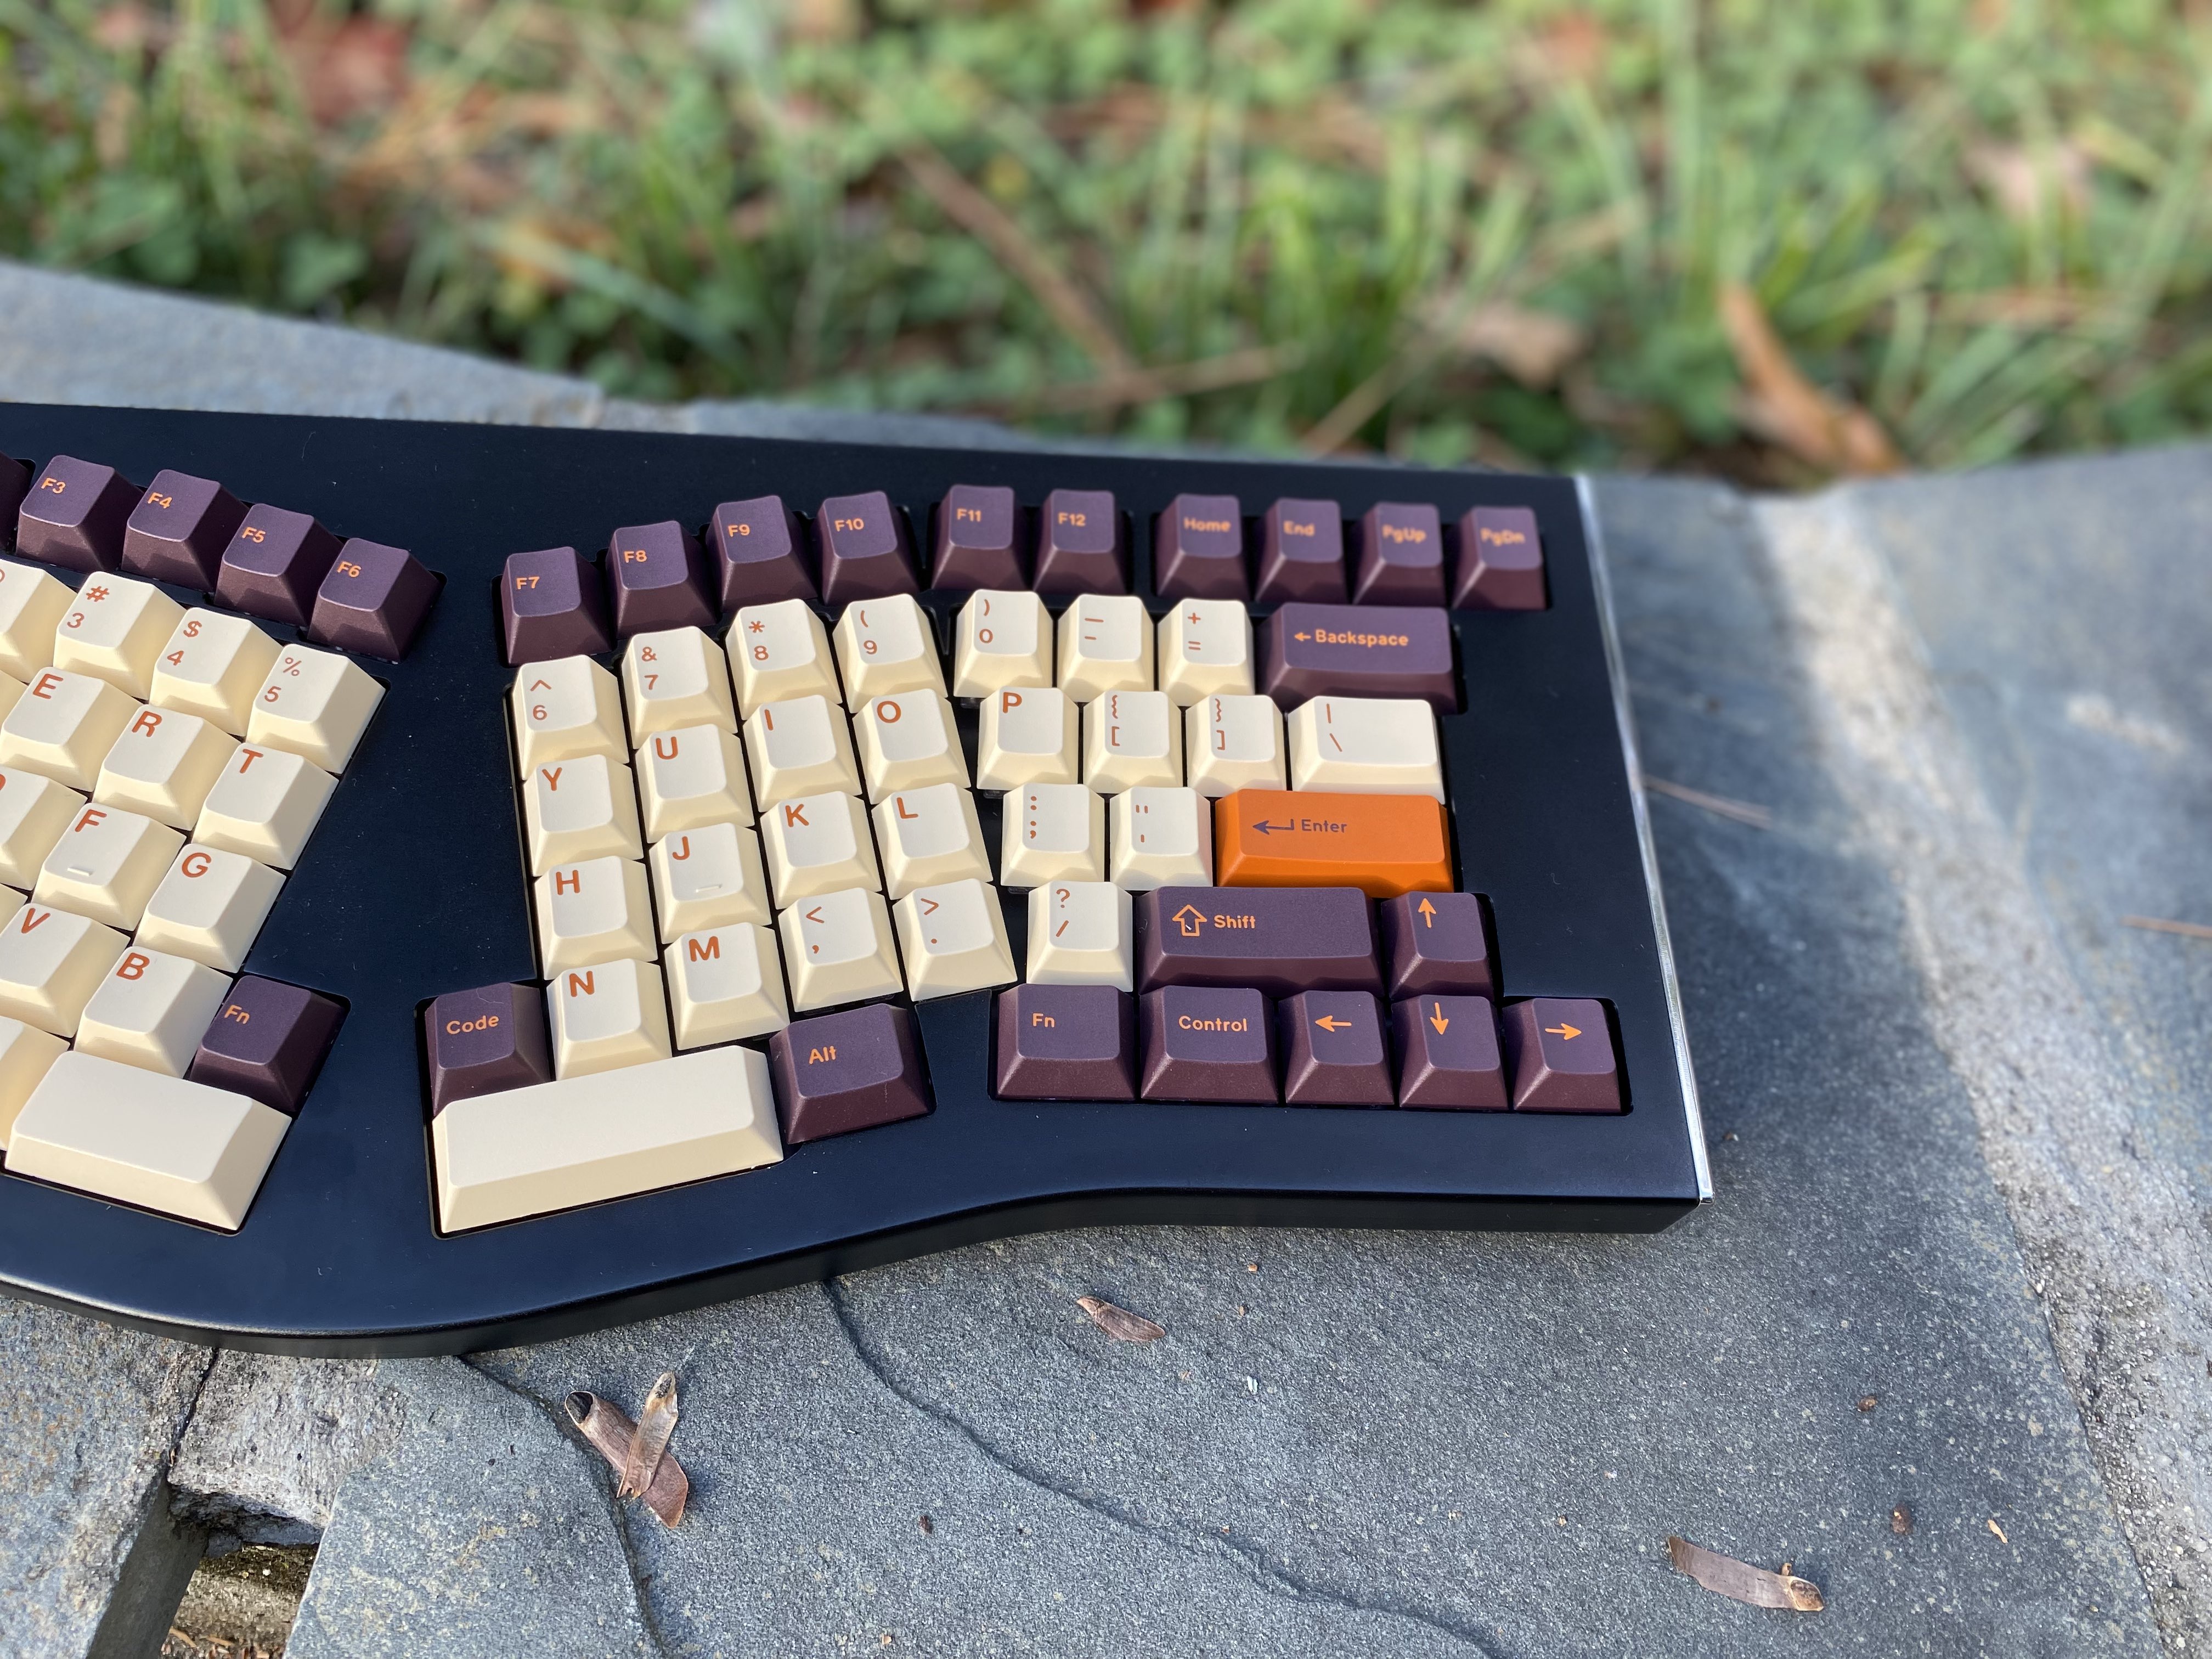
Jabberwocky is a nontraditional Full-Size layout. It has room for all 104/105 keys typically found on a standard ANSI or ISO board, including a full number pad. For the Dexterous Jabberwocky (available as DIY kit or standalone PCB), the number pad sits to the right side of the rest of the keys, similar to a more traditional keyboard. For the Sinister Jabberwocky (available as DIY kit, standalone PCB, or CNC edition), the number pad sits to the left (southpaw layout).
Sinister CNC Edition
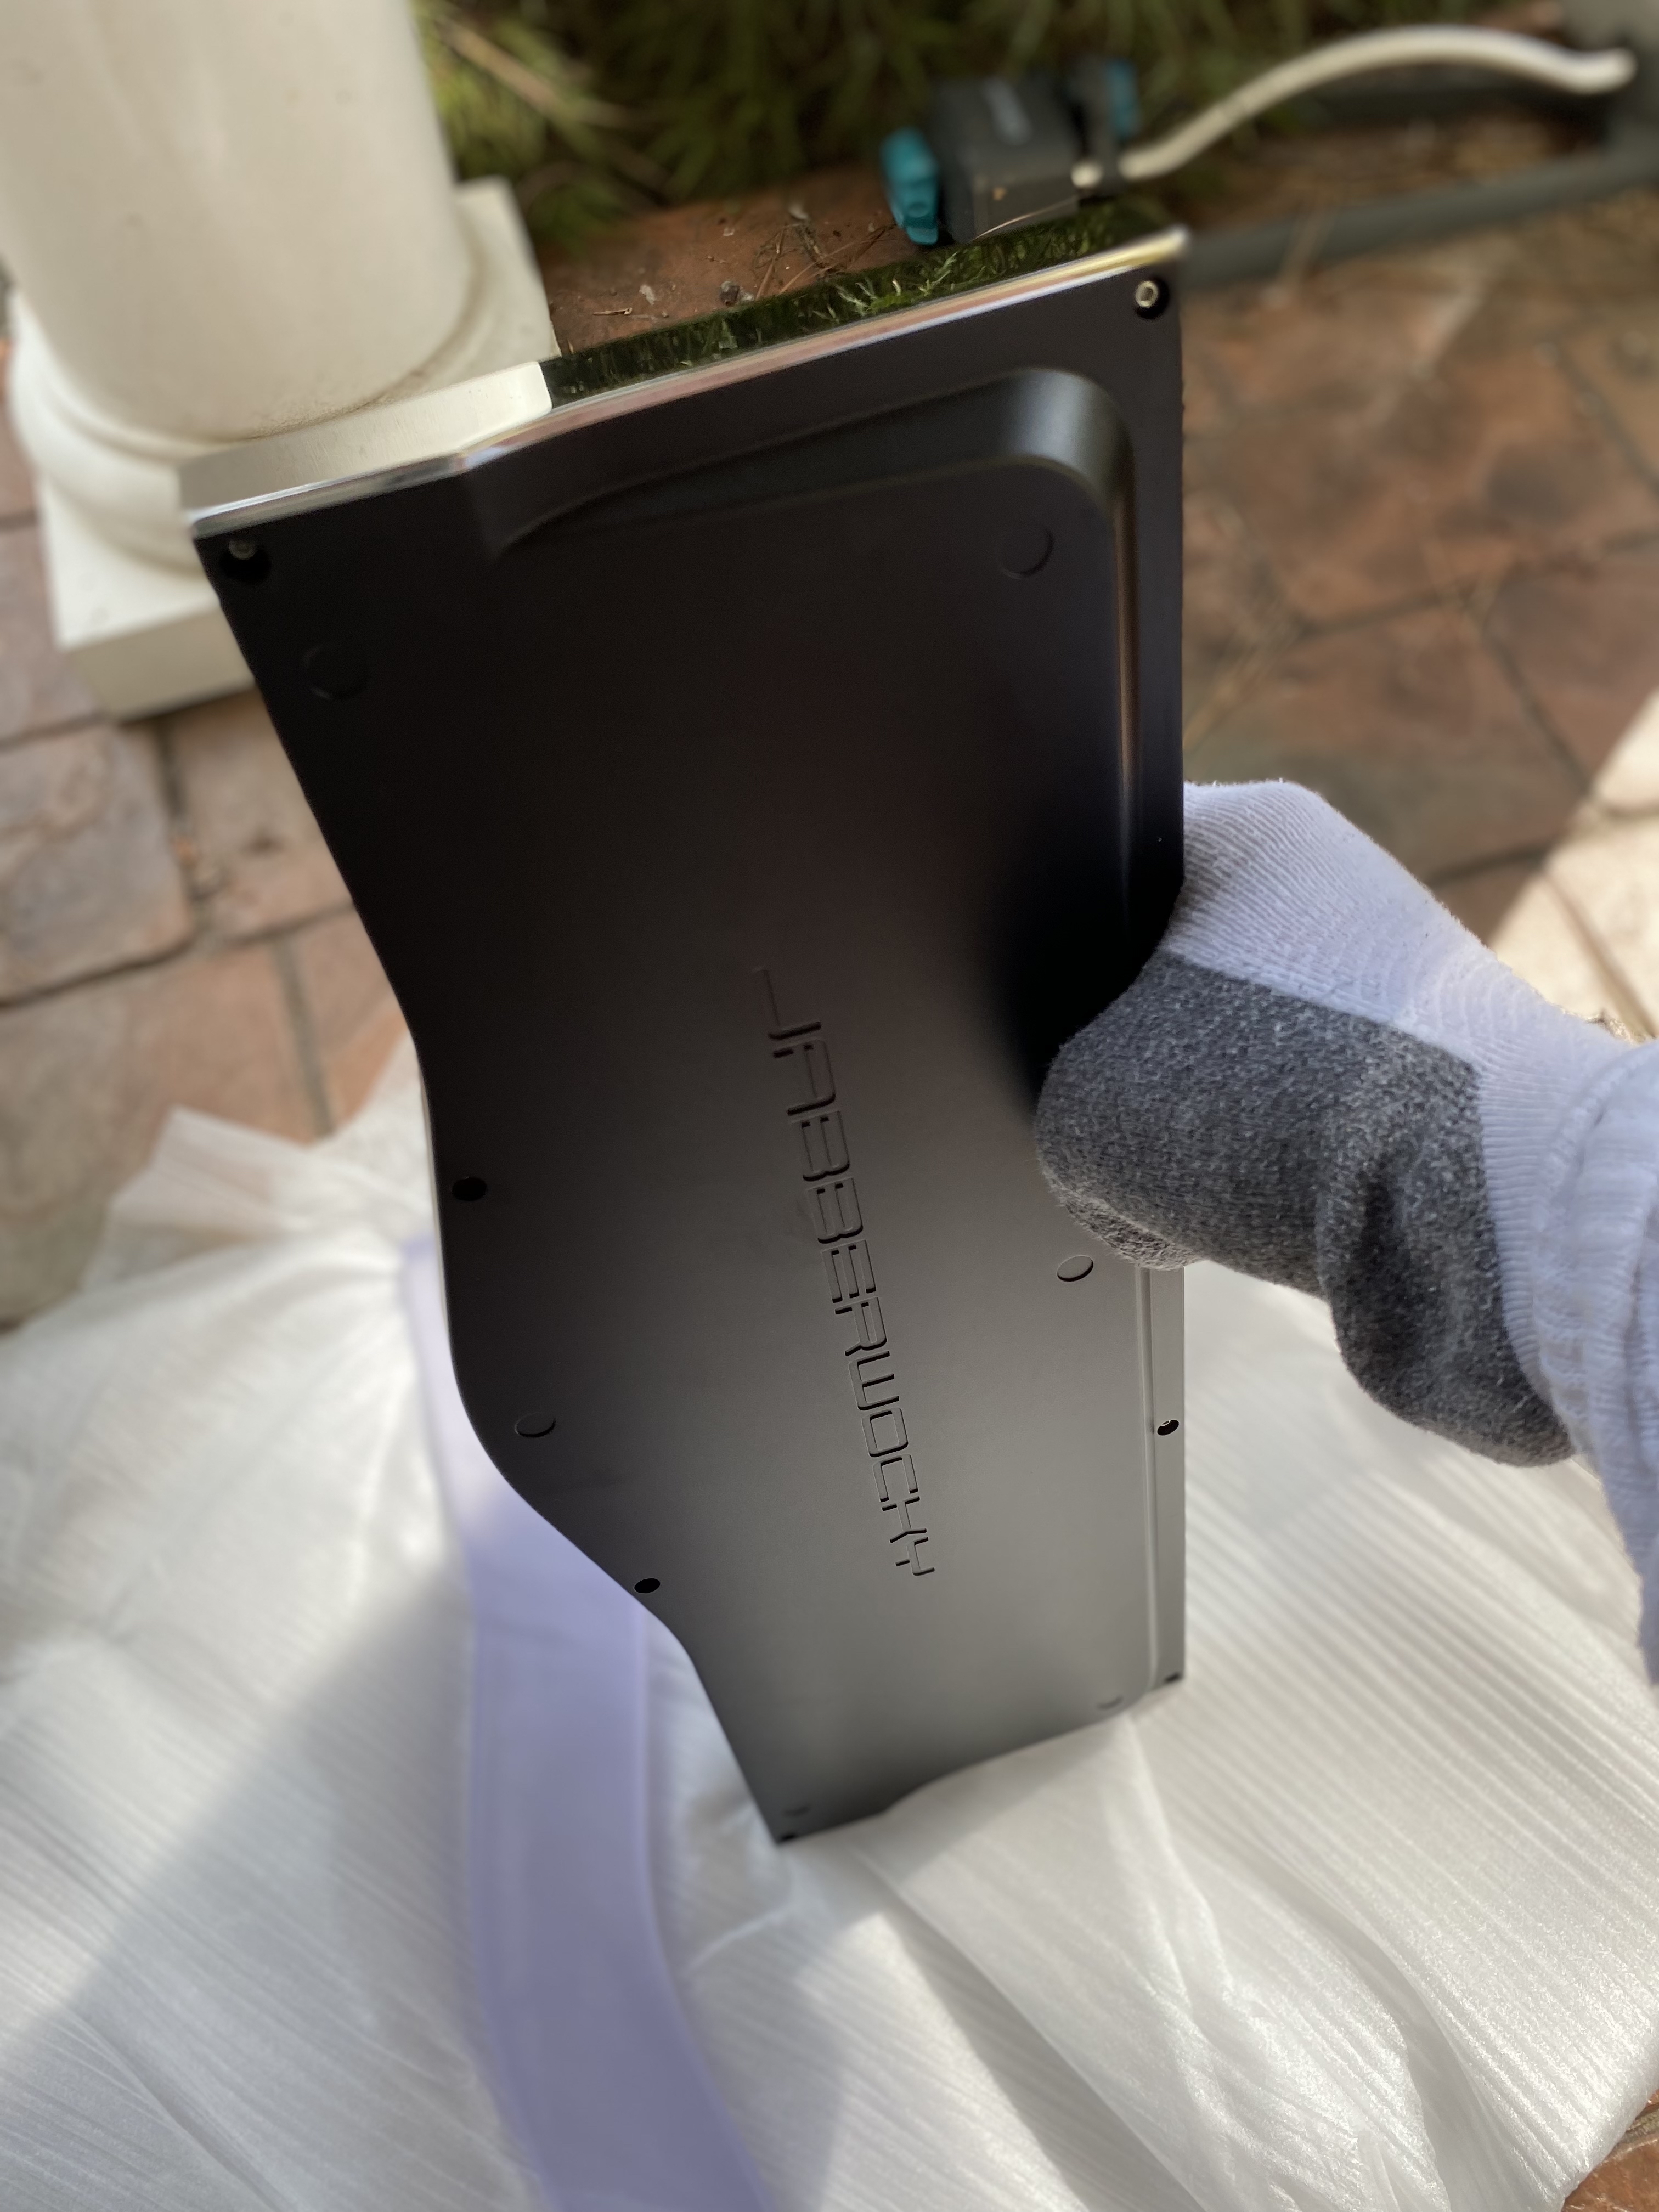

The CNC edition is a top-mounted aluminum board with an internal brass weight and stainless steel side caps. It will be sold as part of a limited factory run of 12 units (plus one prototype, seen above). This does not preclude future larger runs of the board, though I do not have the funding to support a larger batch at this time.
The CNC edition will only be available in the “Sinister” layout, with the number pad on the left. MSRP for the CNC edition is estimated at 975 USD plus shipping (final price TBD based on tariffs/customs). Final unit price of the CNC edition is 995 USD plus shipping.
These units are already in production; you may reserve one with a $200 refundable deposit, with the remainder of the price and shipping due when the units are in hand.
These units have already begun shipping to me! I will be closely examining them over the next weeks, with some units being shipped to customers in December and some in January. You can use the order form to add yourself to the CNC waitlist should anyone decide to cancel.
Update 10 January 2023: Invoices are slowly going out for the black Jabberwocky units. The four units originally intended as burgundy have been sent back to China to be recoated, and they will not be invoiced for until they return.
Update 05 July 2023: The Jabberwocky CNC edition is fully sold out. It is possible I may sell one of the two units from my personal collection in the future, but there are no plans for that at this time.
A Jabberwocky CNC Edition kit will include:
- 1x Anodized aluminum top frame
- 1x Anodized aluminum bottom frame (engraved with “JABBERWOCKY”)
- 1x Internal rectangular brass weight
- 2x Stainless steel side caps
- 1x Unified Daughterboard with 4-pin JST cable
- 2x PCBs:
- 1x Solderable PCB (“Green” variant)
- 1x Hotswap PCB (“Black” variant)
- 2x Switch plates:
- 1x CNC’d aluminum switch plate (silver finish)
- 1x FR4 switch plate (black)
- Screws / bolts
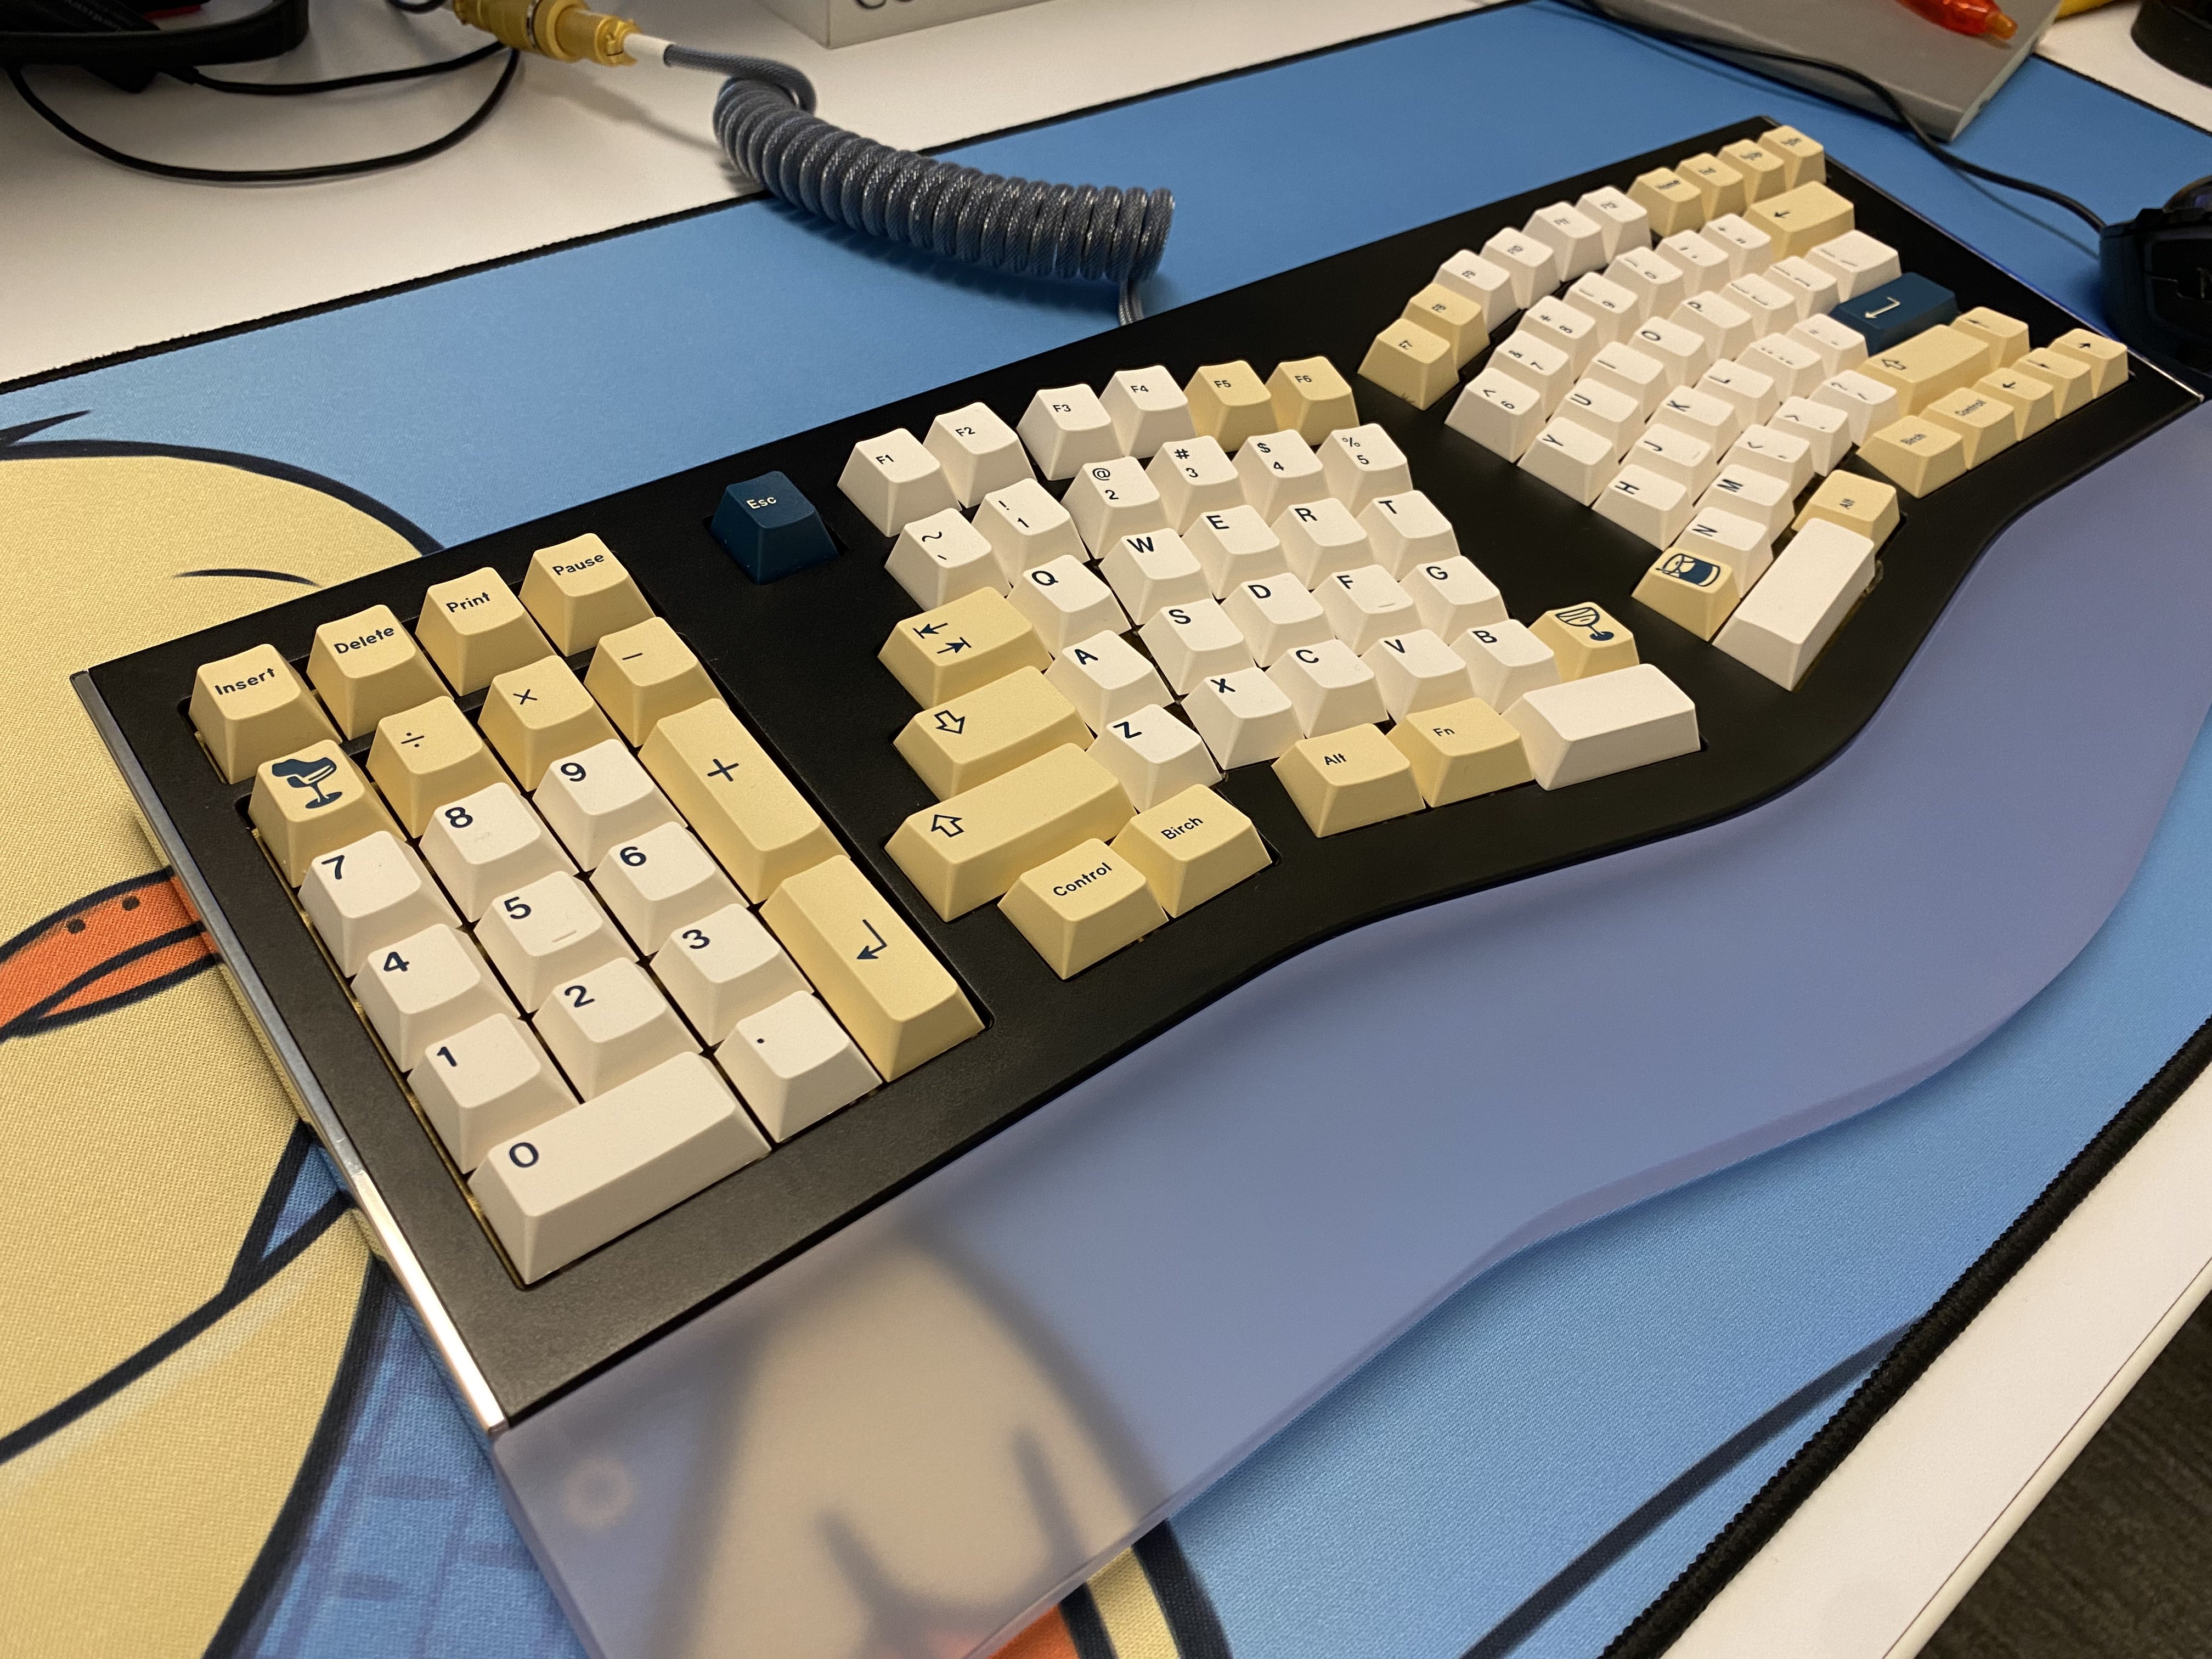
CNC Edition Color Options
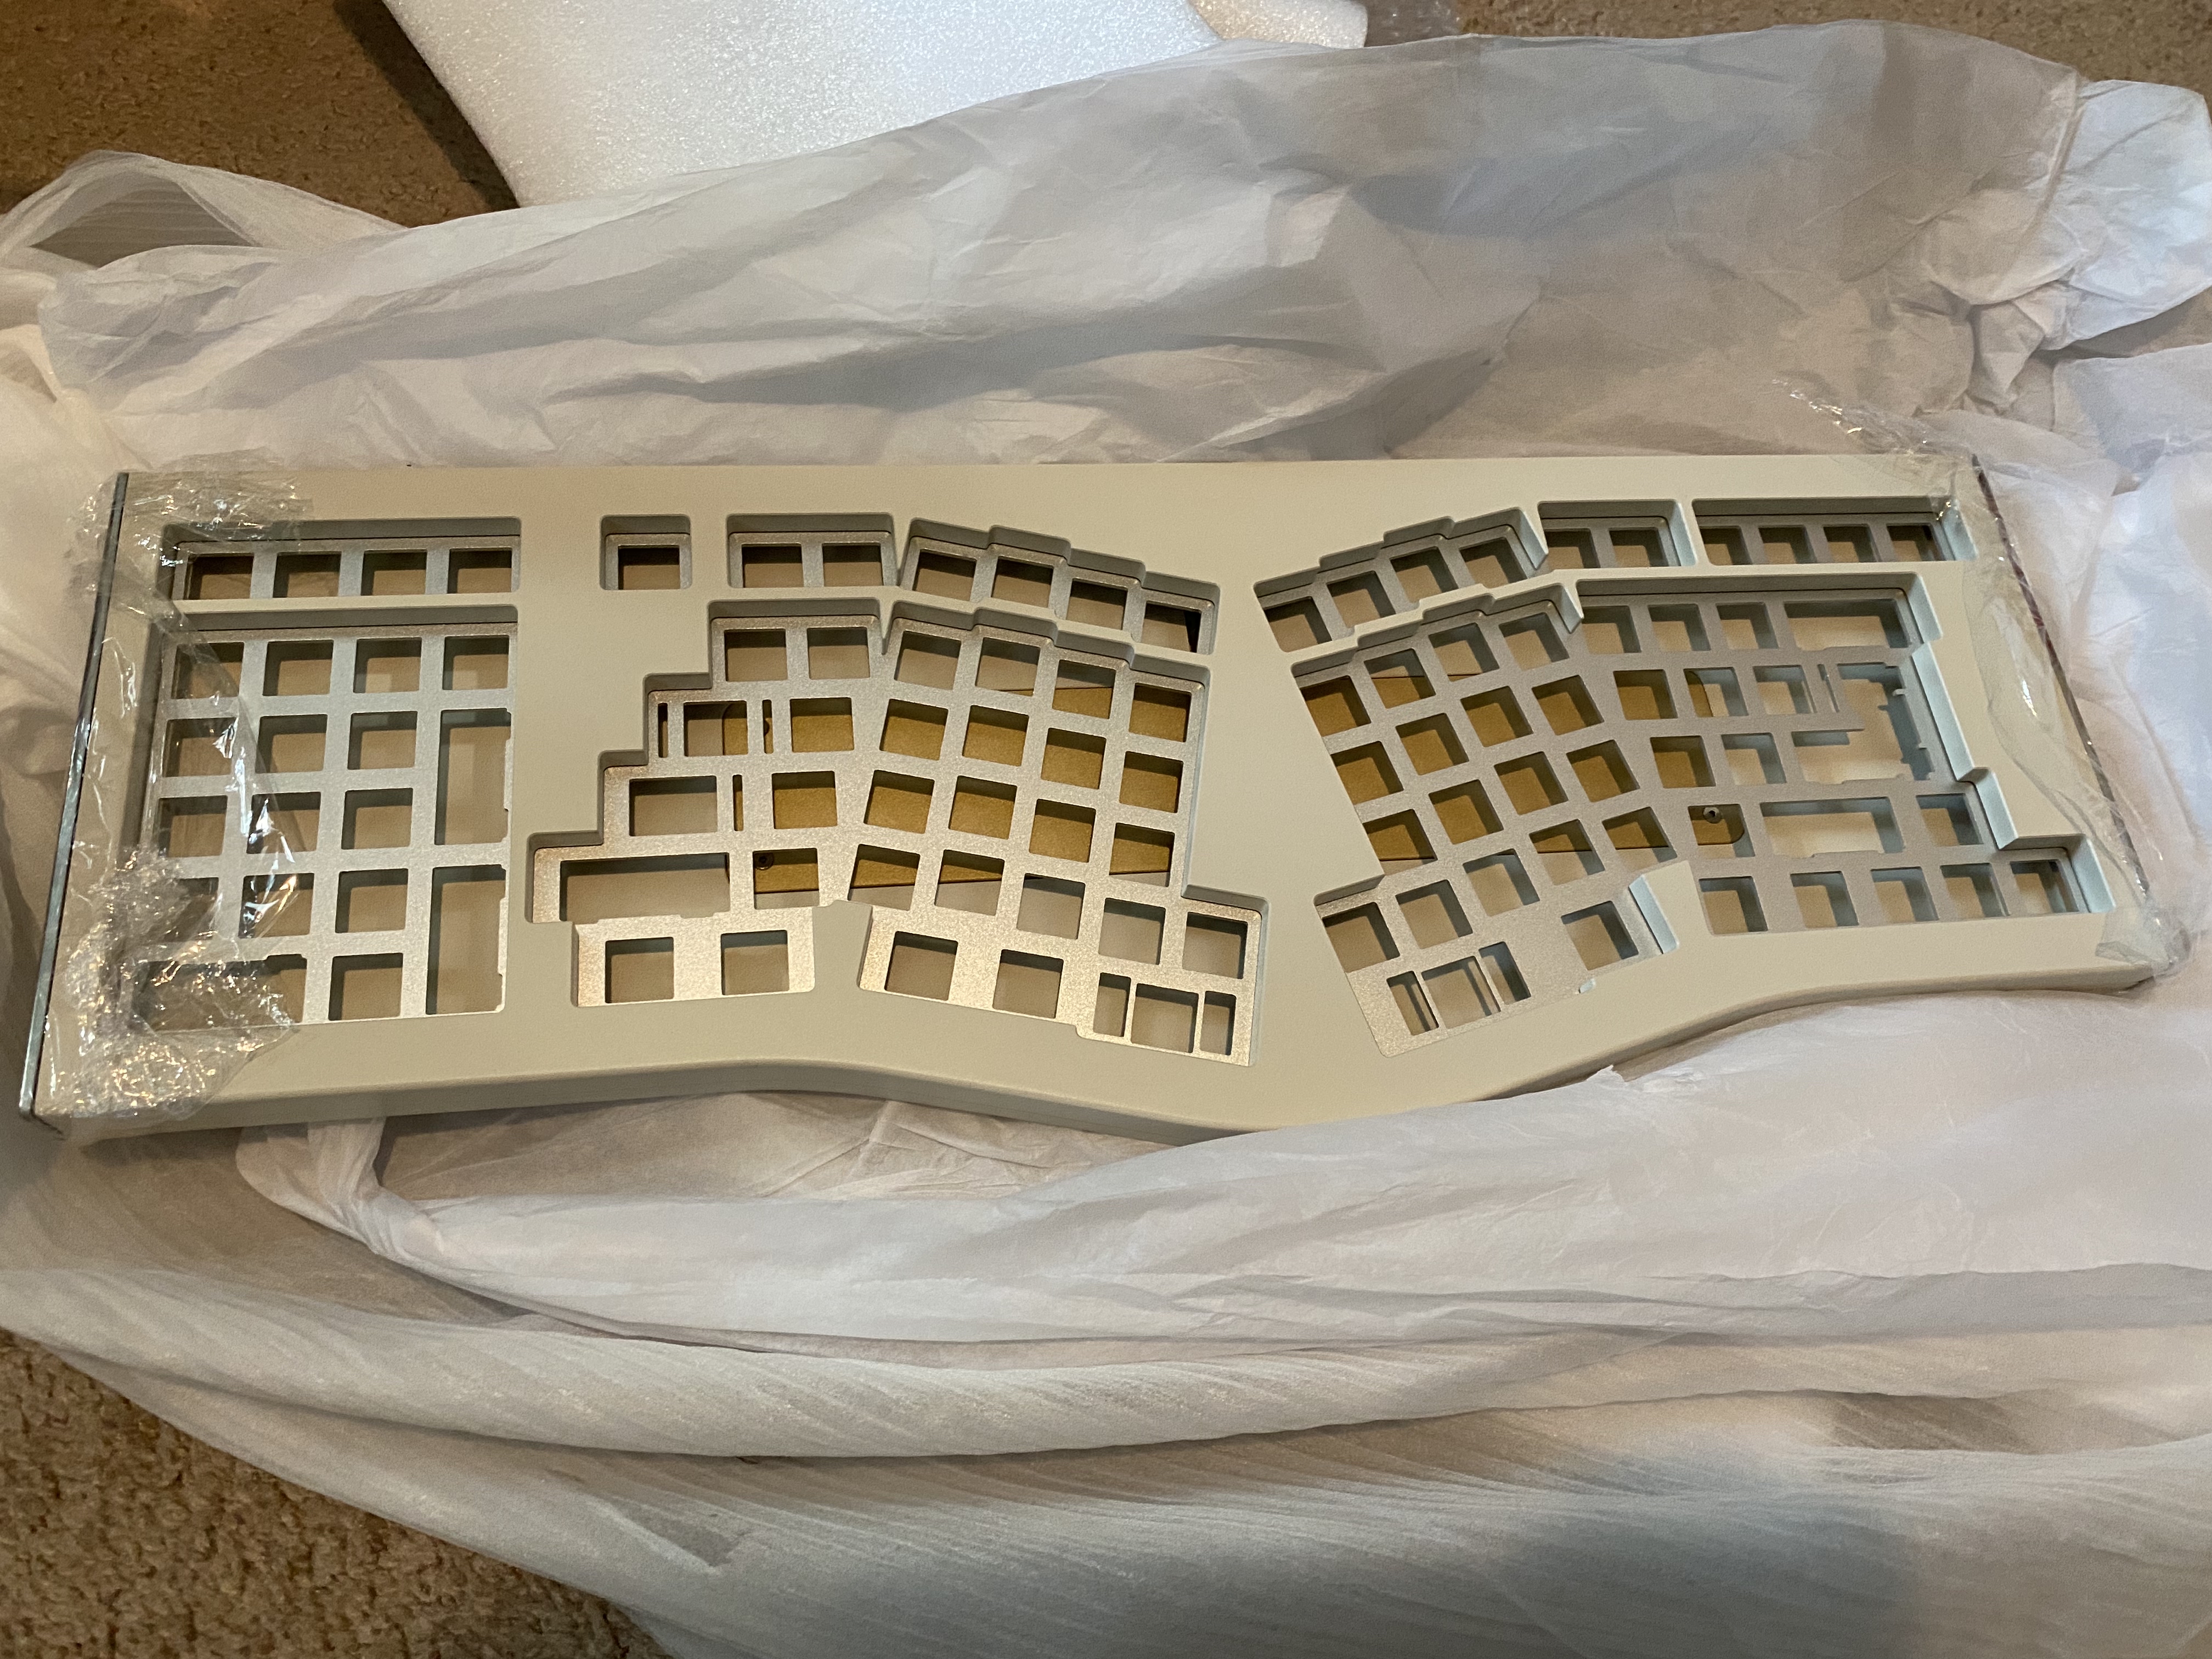
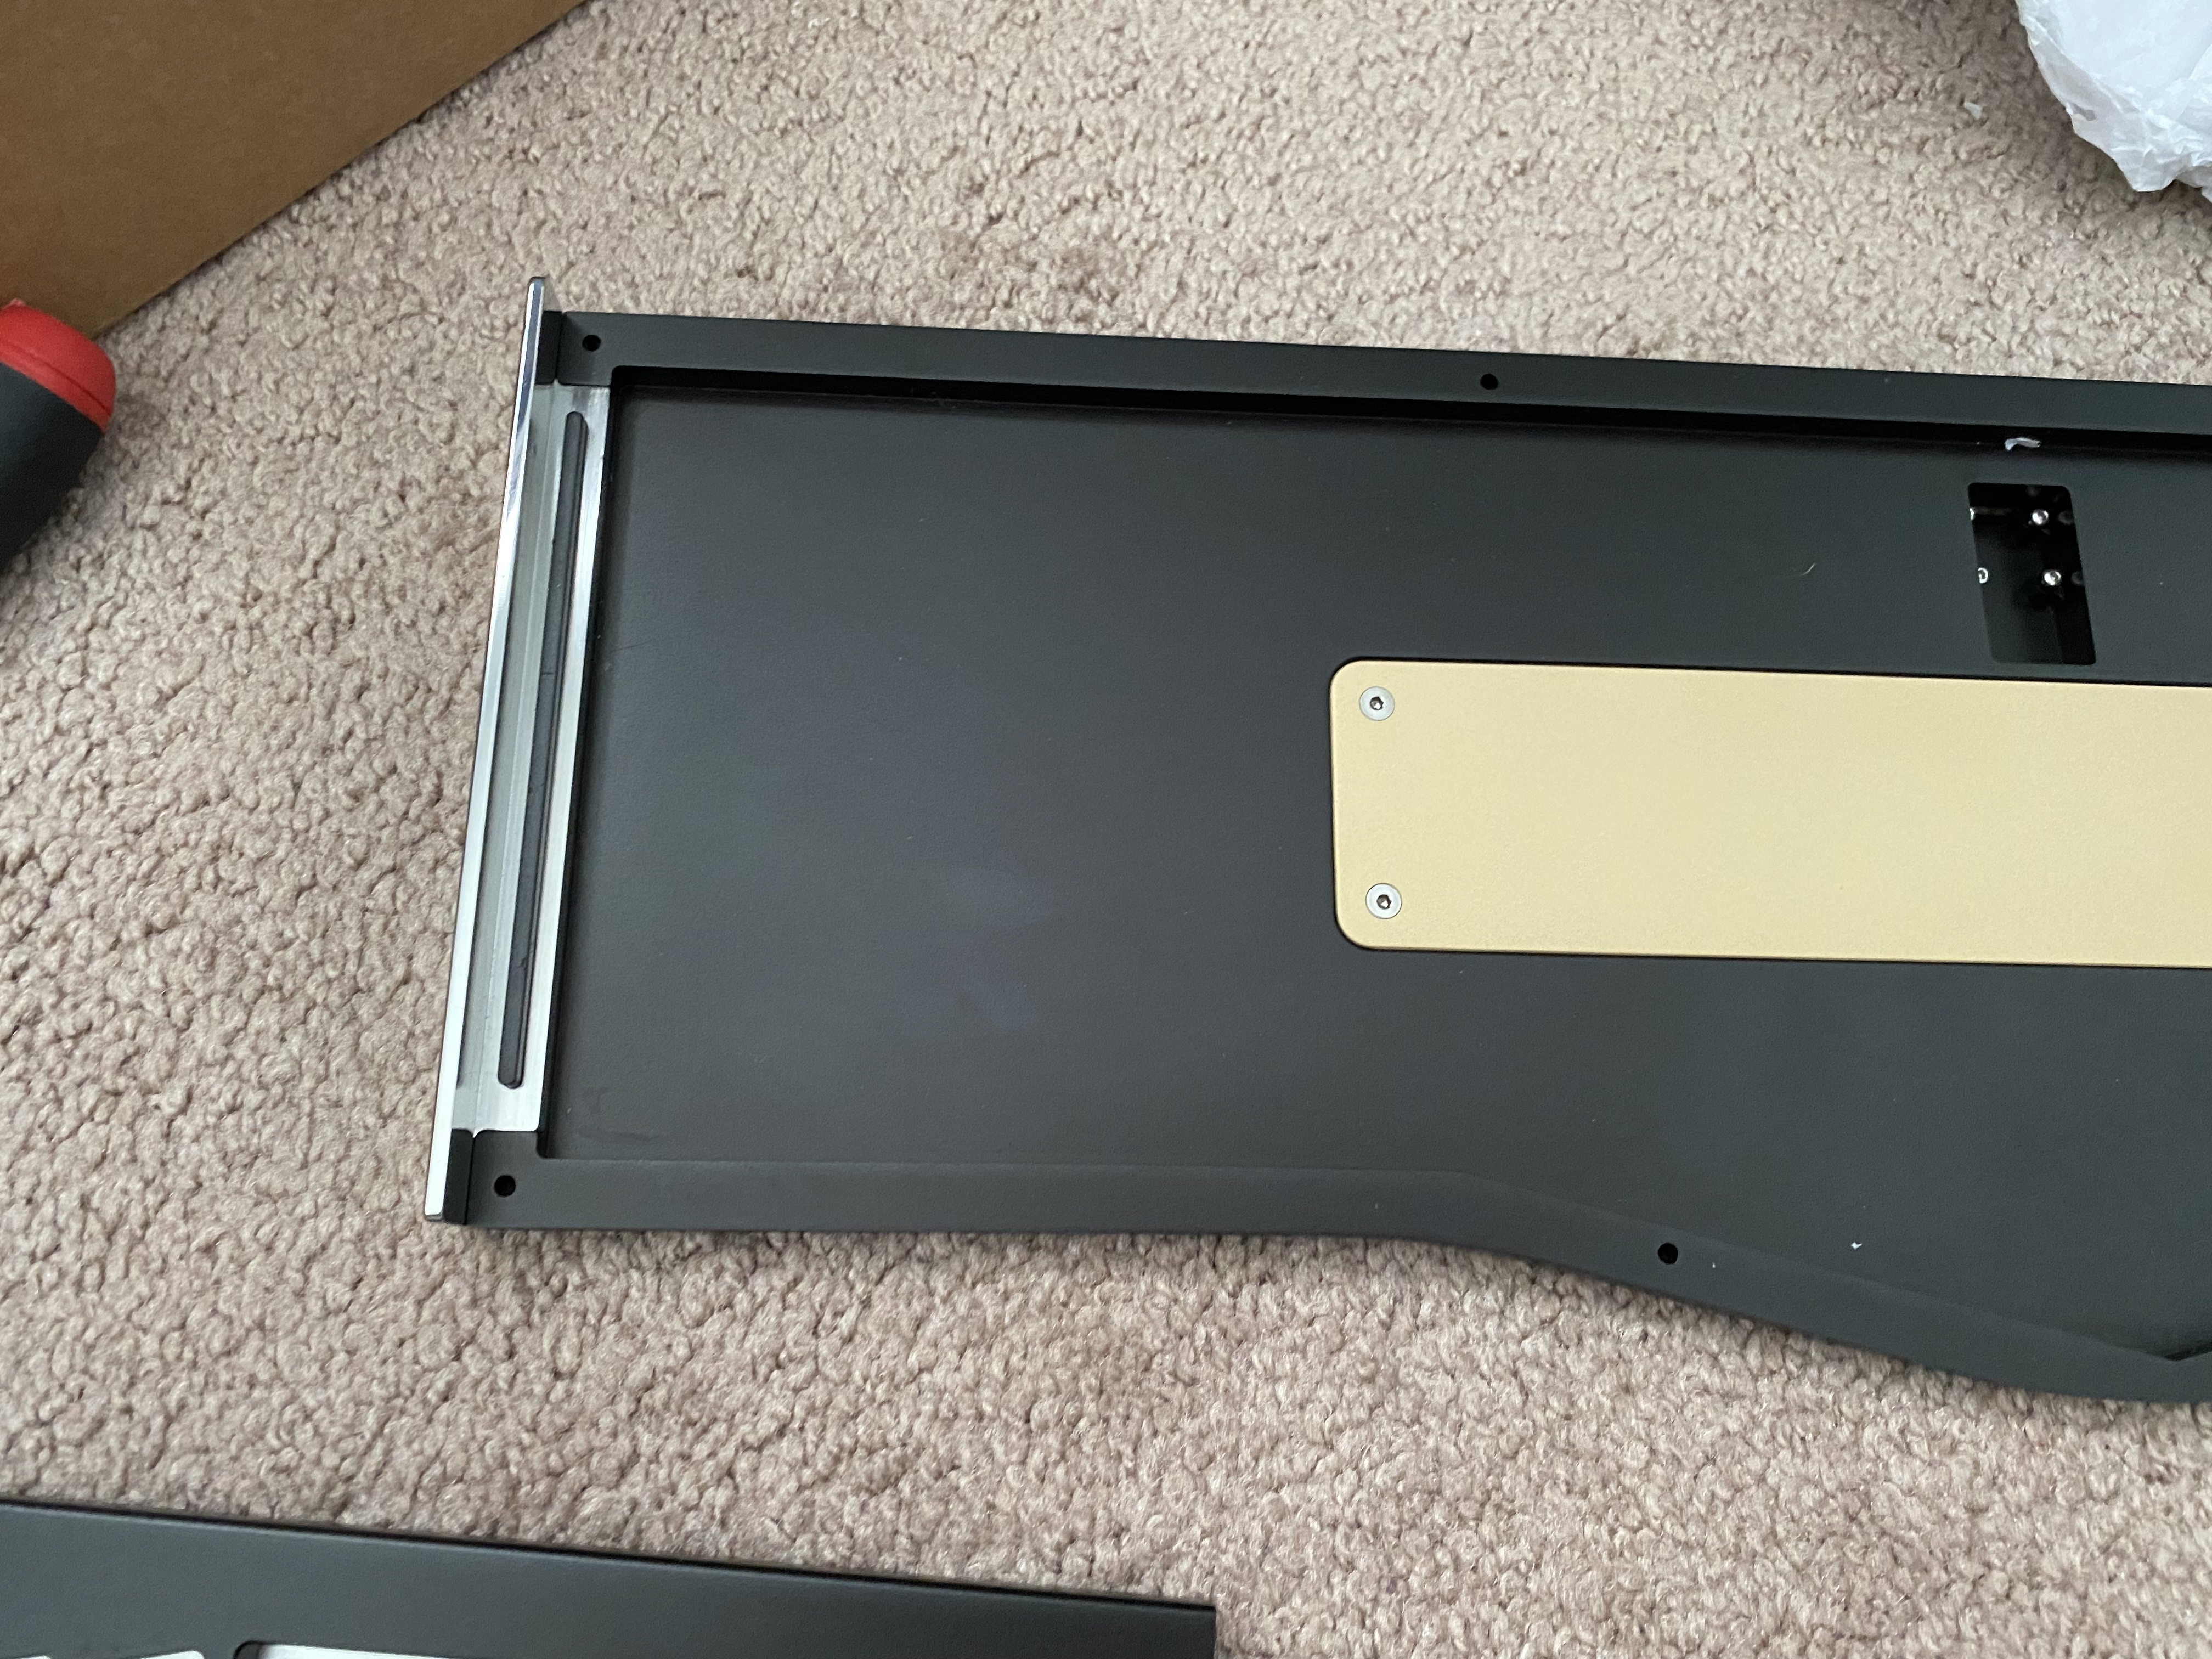
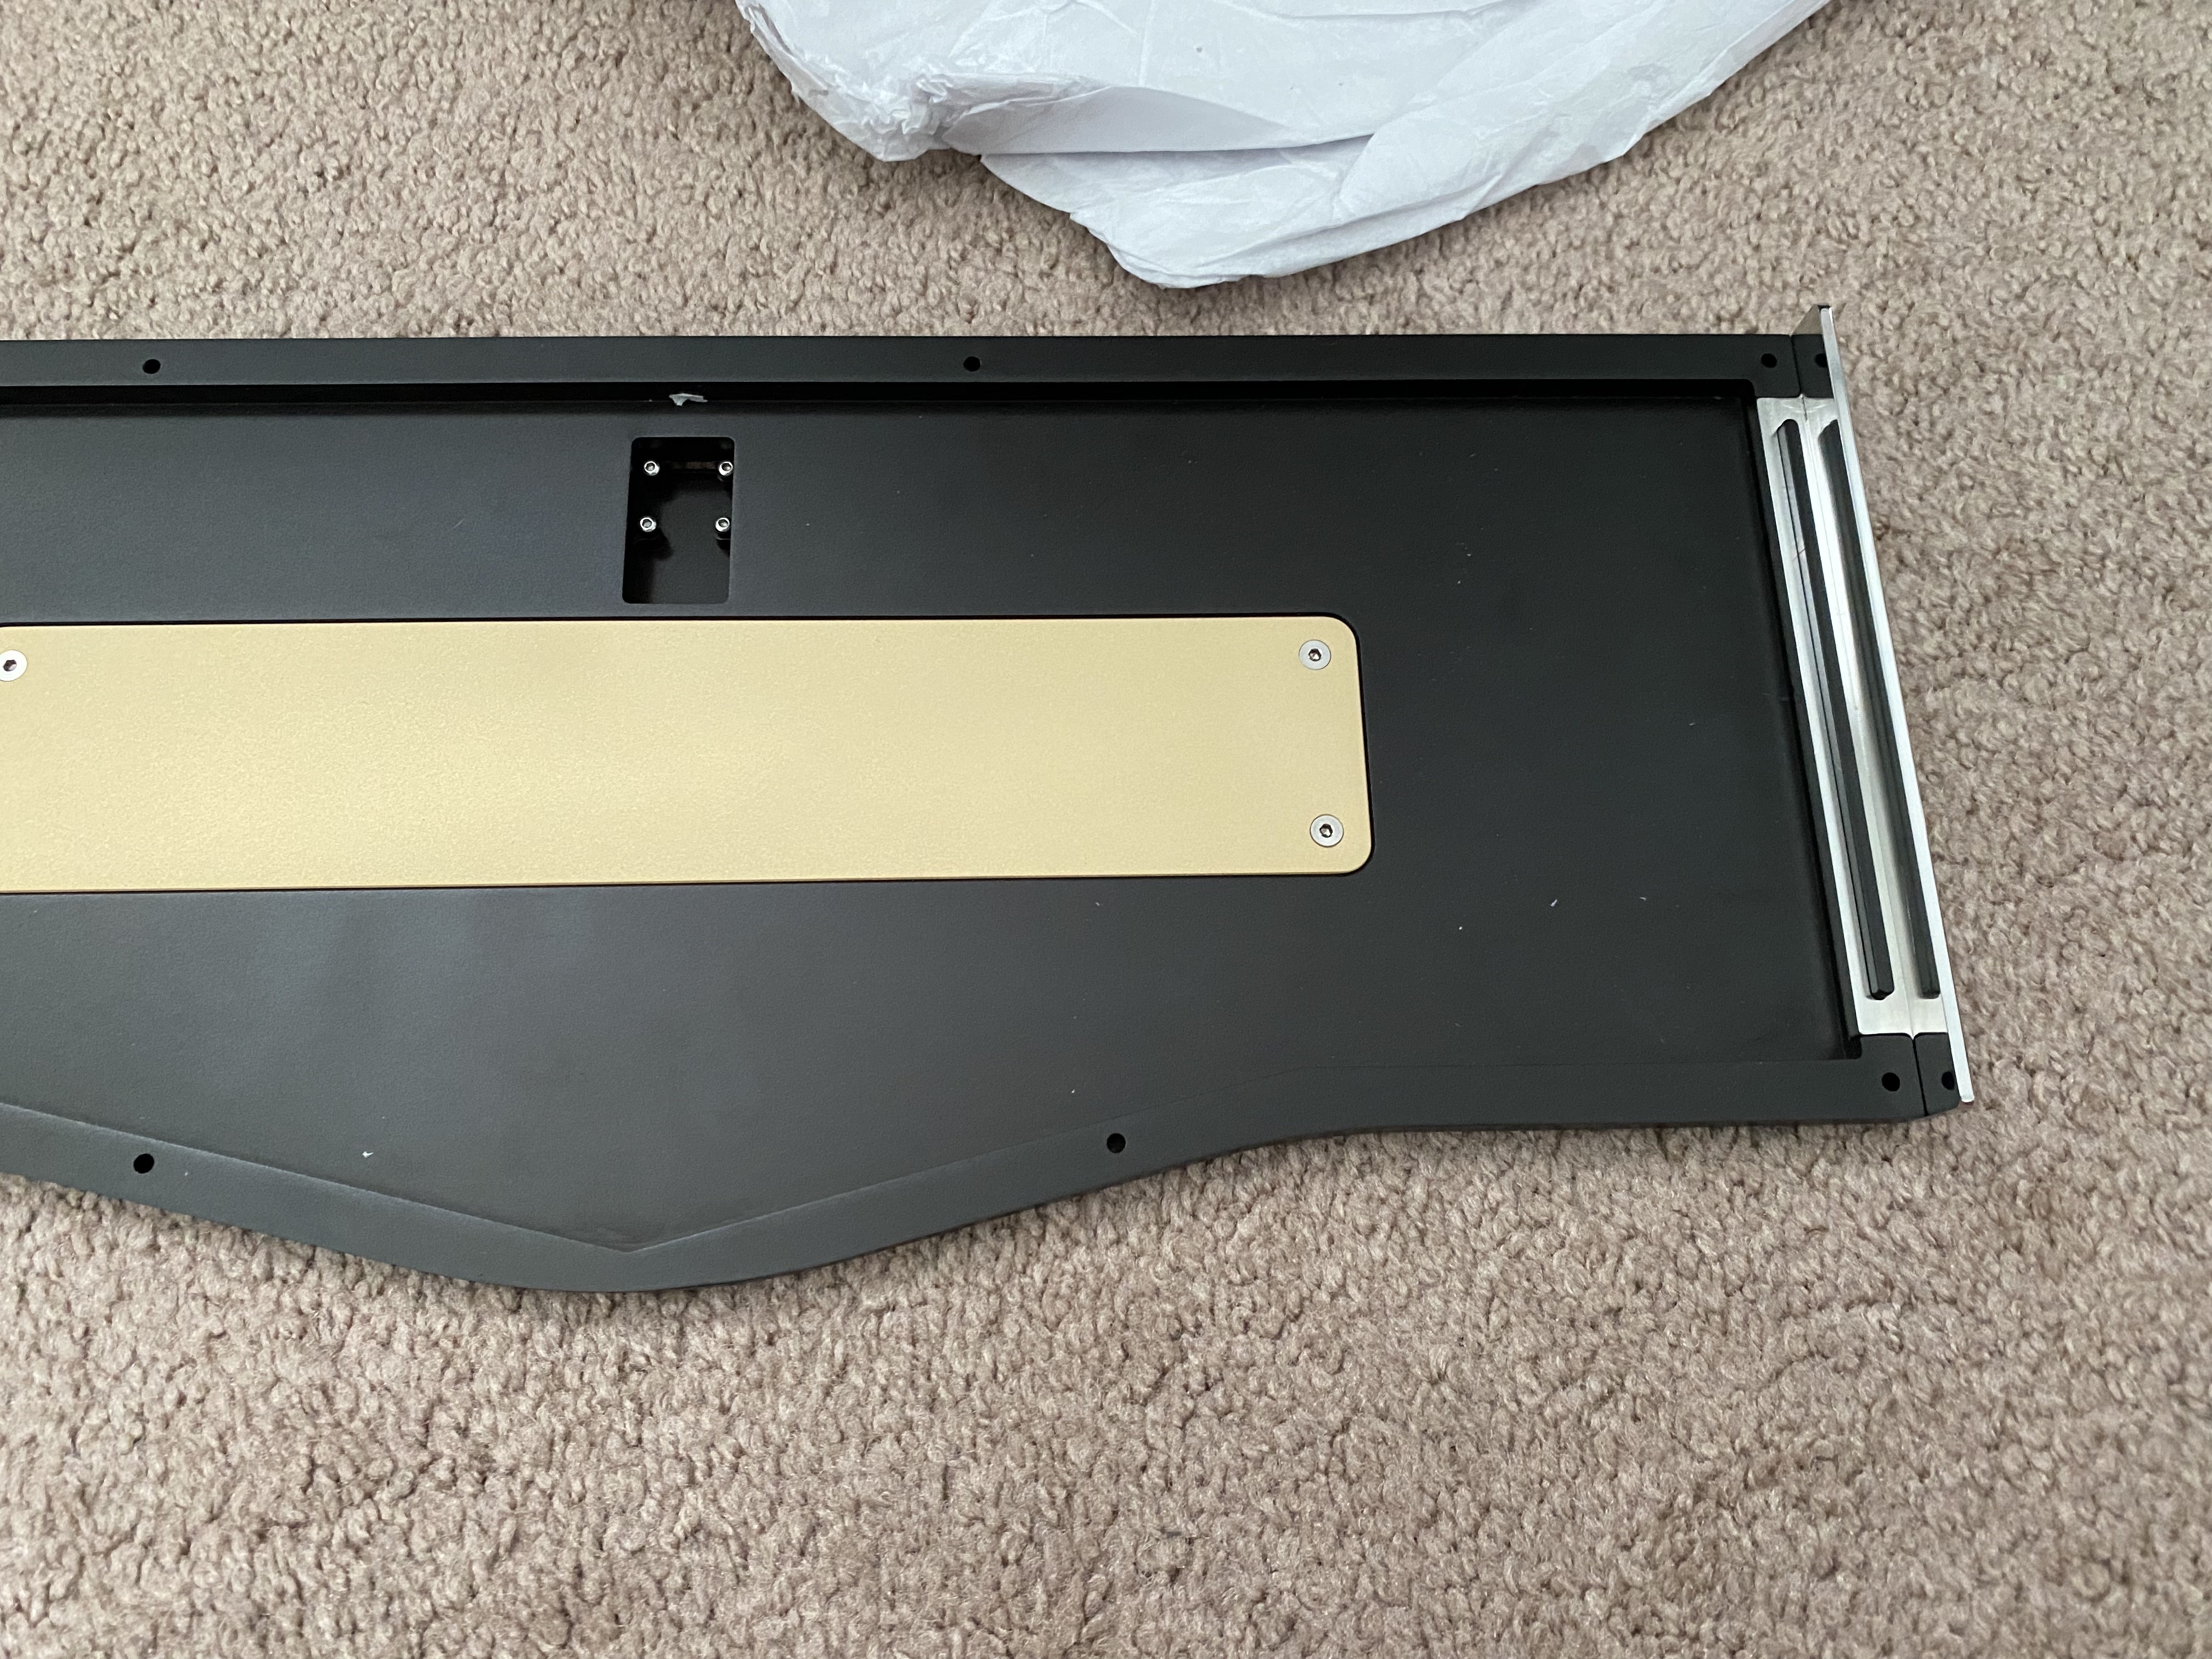
In addition to the black seen in the prototype, the CNC edition will be available in Burgundy and Navy Blue (though at this time, the Navy Blue units are already reserved). Above are sample photos of the colors.
UPDATE 17 January 2023: Several significant flaws in the anodization were found in the Burgundy units, and they were shipped back to the factory to be recoated in e-Beige. This color was chosen in part because two units had already been successfully coated in e-Beige at the factory due to anodization flaws. Now having seen it in person, I have to say that the e-Beige is fantastic, and it provides a really solid coat in general; no hint of the original anodization color comes through, as far as I’ve been able to discover.
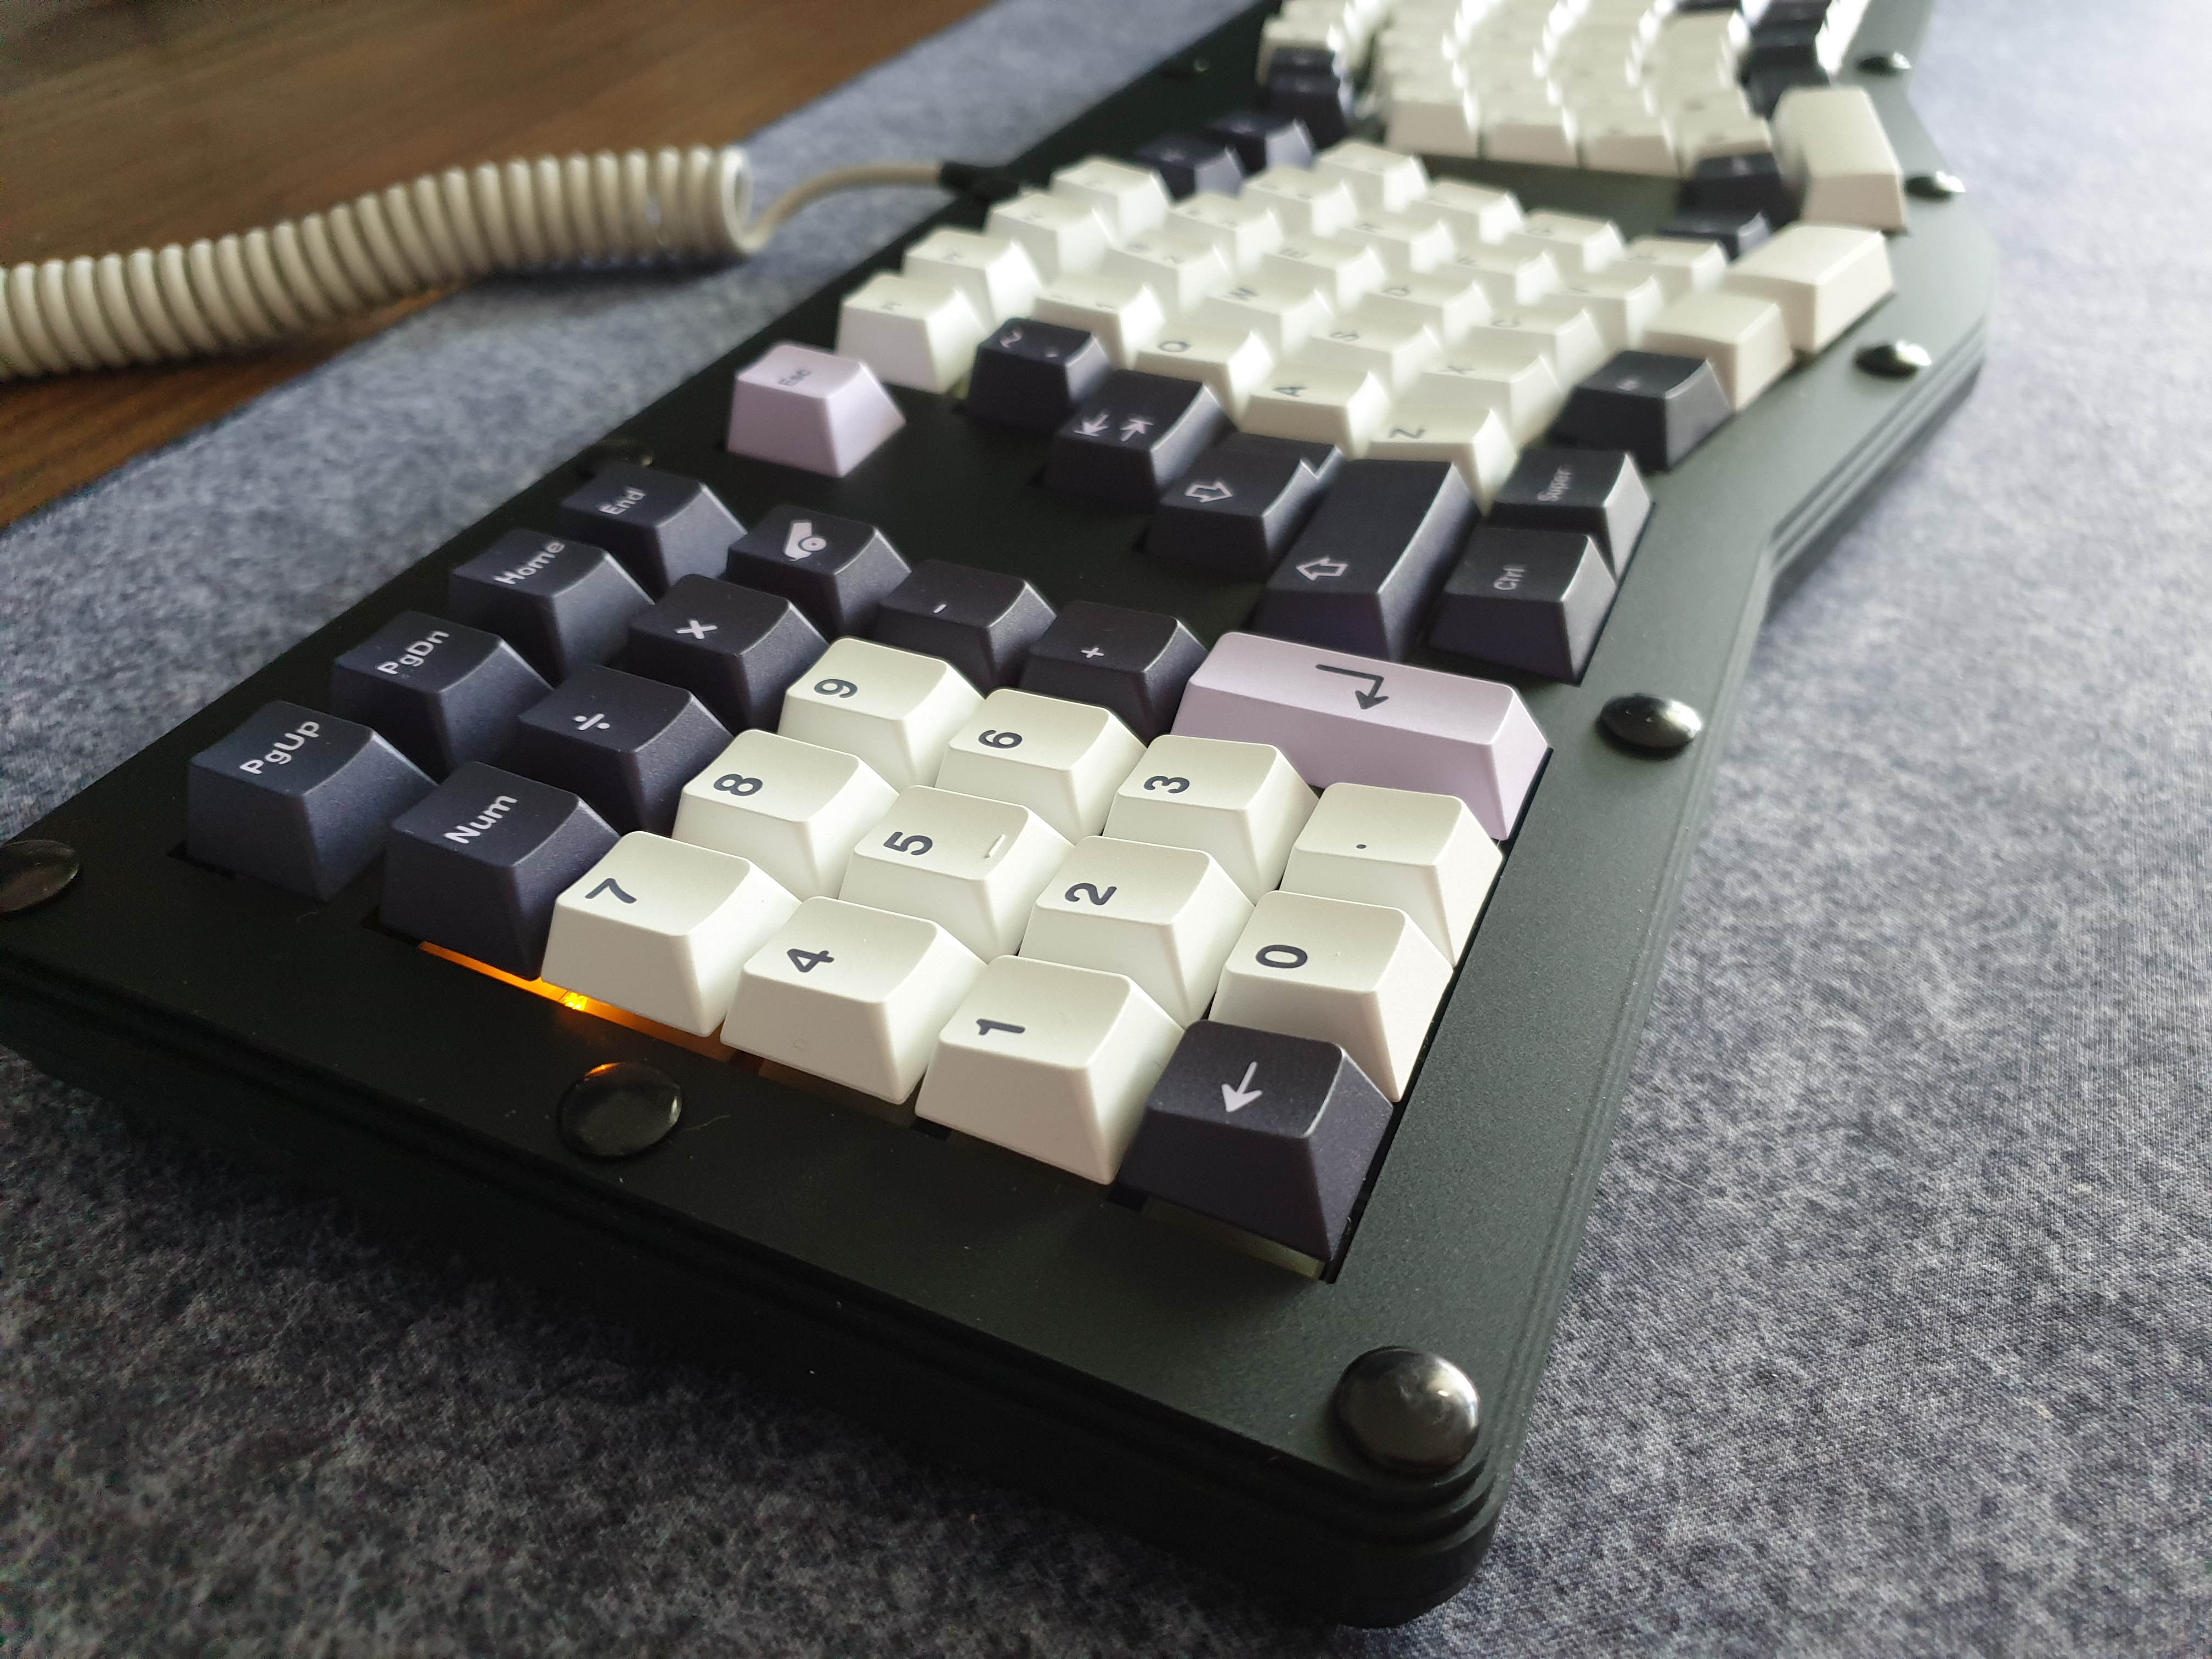
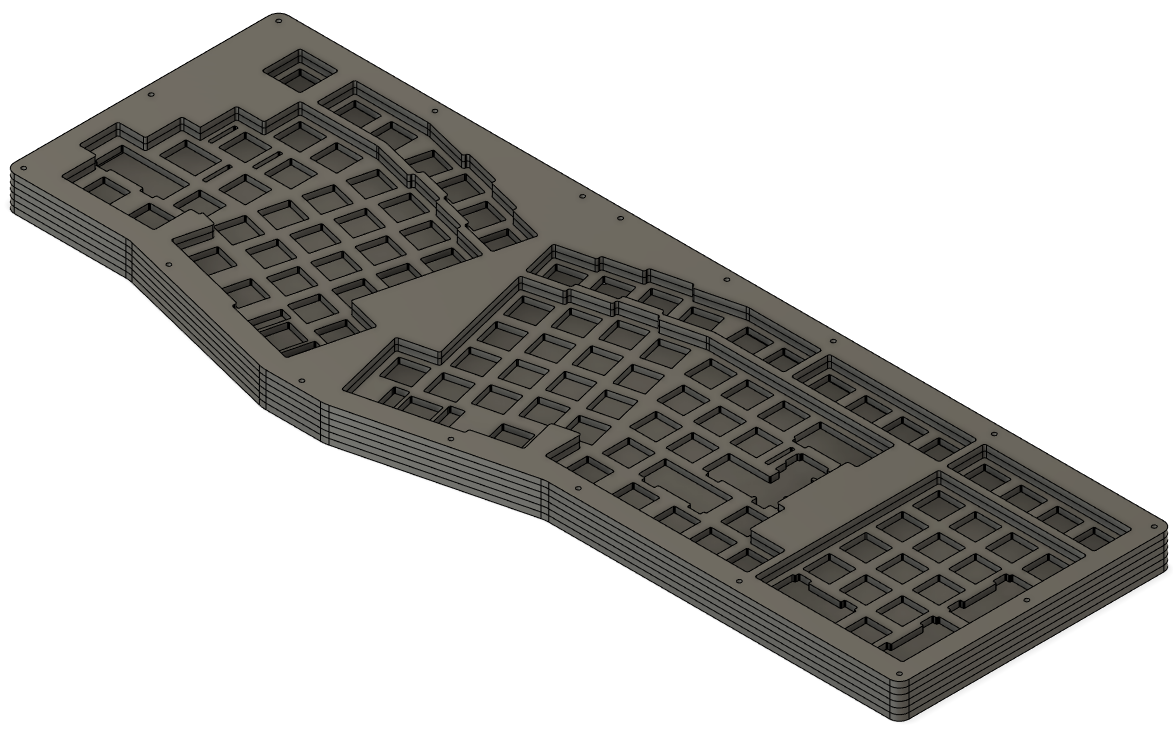
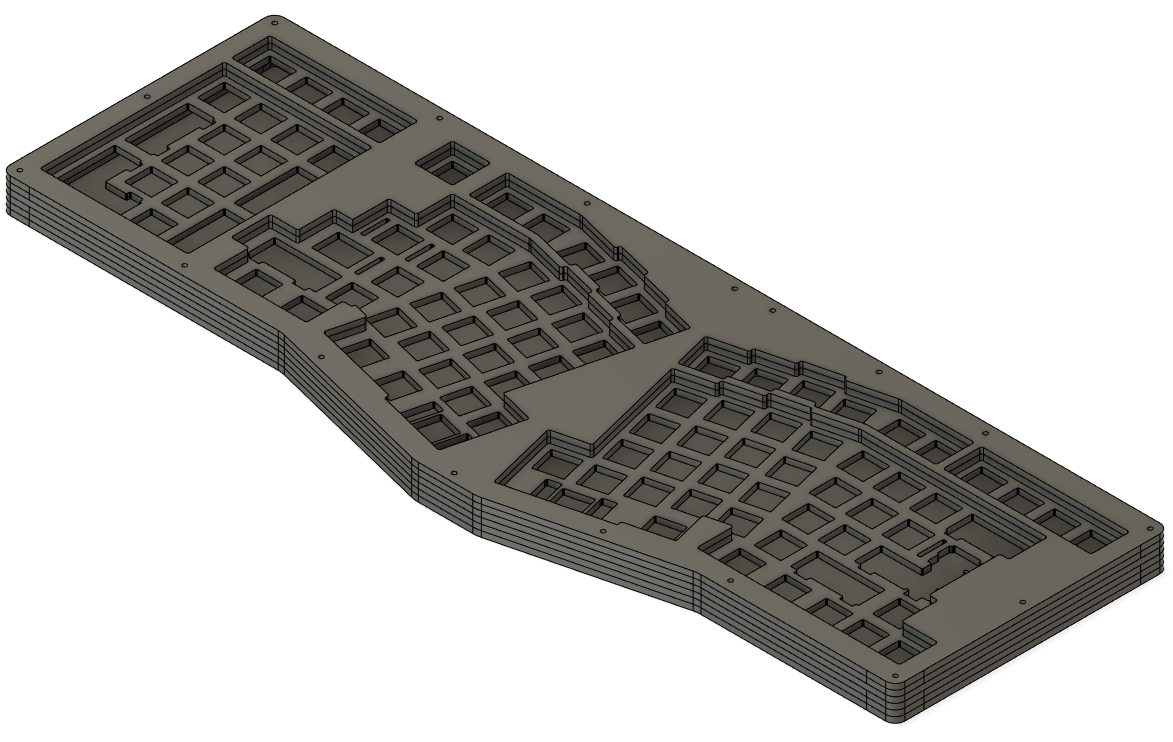
FR4 Skeleton Case Kit
As the price of the CNC edition is admittedly quite high, I am also providing a far more budget-friendly case option. Similar to the first Jabberwocky run (examples seen above), I am offering simple “skeleton case” kits for both the Sinister and Dexterous layouts. These are made from FR4, a material commonly found in PCBs. It is a blend of fiberglass, copper, and other materials.
FR4 kits will include two black-colored plates: a bottom and a top, with the top serving as the Jabberwocky’s switchplate. The two plates will attach via ordinary M2 screws and spacers, with other components in the middle. The bottom plate of the FR4 kit will include additional mount holes to attach a Unified Daughterboard if so desired.
Because of its length and rectangular exterior design, the FR4 skeleton case should be compatible with most palm/wrist rests intended for standard full-size keyboards.
Acrylic Sandwich Case
lukeski14, an extremely helpful Jabberwocky devotee, has provided an open-source repository for building your own acrylic sandwich Jabberwocky board (either Dexterous or Sinister).
Further Technical Details
Keycap Compatibility
Columnar stagger keyboards like the Ergodox tend to require nonstandard keycap sets, and it can often be frustrating to discover that your favorite keycap colorway has no support for one’s ergonomic board. The Jabberwocky, however, was designed to use primarily mainstream keycap sizes and rows.
Nonstandard Keycap Requirements
Jabberwocky requires a few keycaps that are nonstandard, but most base kits and spacebar kits should support it:
- The Jabberwocky requires a number pad.
- The Jabberwocky requires two 2.25u Shift keys for an ANSI-like layout.
- A second 2.25u Shift is a common inclusion in base kits, but it will sometimes occur in an extension kit instead.
- ISO or JIS layouts on the Jabberwocky will require one 1.25u Shift and one 2.25u Shift.
- The Jabberwocky layout assumes all of its navigation cluster keys are on the top row (though this is configurable in its firmware).
- For a typical Cherry keycap set, this means having Page Down, End, Delete, etc. in R1.
- These keys are very typically included in a base kit or numpad kit, as they are also needed in 1800 keyboards.
- The Jabberwocky requires two short spacebar sizes: 2.00u and 2.75u.
- These may require the purchase of a spacebar child kit in addition to base.
- If true spacebars of the right size are not available, many base kits will come with additional 2.00u and 2.75 shift keys that can be used as an alternative.
- Recommended: if available, you may place a 1.25u spacebar to the left of the left bar, though this can also be a standard Menu or Fn key (or whatever you configure).
Stabilizer Requirements
It is recommended that Jabberwocky keycaps that are 2.00u or longer be paired with short PCB-mounted stabilizers. A Jabberwocky build will require between three and nine 2u stabilizers, depending on the layout options selected by the user. The default layout of the hotswap PCBs use all nine, while many users may choose to split backspace or other keys. Stabilized keys are as follows:
- One ANSI or ISO enter/return key, either of which will require a stabilizer.
- Two spacebar keys that cannot be split or changed:
- 2u left spacebar
- 2.75u right spacebar
- These 2u keys that can optionally be split into 2x1u keys:
- Number pad 2u plus
- Number pad 2u enter
- Number pad 2u zero
- 2u backspace
- The shift keys may be split for non-ANSI-like layouts:
- The left 2.25u shift key may be split into a 1.25u shift on the left and a 1u alpha key on the right, similar to an ISO layout.
- The right 2.25u shift key may be split into a 1u alpha key on the left and a 1.25u shift key on the right, similar to a JIS alpha layout.
- Both keys may be split simultaneously, similar to a Brazilian ABNT2 layout, but this is rare.
PCB Options
The original Jabberwocky generation came with two options: red or blue, Dexterous or Sinister. For this, the second generation, the list has expanded to six (though not all will be produced initially).
| Variant | Numpad side | Daughterboard | Soldered / Hotswap | Opt. In-Switch LEDs |
|---|---|---|---|---|
| Blue | Left (Sinister) | Elite C | Soldered (SMD DIY kit) | Caps Lock & Num Lock indicators |
| Red | Right (Dexterous) | Elite C | Soldered (SMD DIY kit) | Caps Lock & Num Lock indicators |
| Green | Left (Sinister) | Unified DB | Soldered (switches & LEDs) | Indicators and/or full backlight |
| Yellow | Right (Dexterous) | Unified DB | Soldered (switches & LEDs) | Indicators and/or full backlight |
| Black | Left (Sinister) | Unified DB | Hotswap (with some soldered layout options) | None |
| White | Right (Dexterous) | Unified DB | Hotswap (with some soldered layout options) | None |
All six Jabberwocky PCBs will be compatible with USB-C, connecting either through an Elite C or Unified Daughterboard. Green, Yellow, Black, and White PCBs may also optionally have a USB-Mini port directly attached; this is not compatible with the CNC edition case, but it is available for users of the DIY FR4 skeleton case (or those that are building their own acrylic case).
The Sinister CNC Edition will only be compatible with the Black and Green PCBs, both of which are already included in the price of the board.
The FR4 DIY case will come in two variants, Dexterous & Sinister, and each will be compatible with all three PCBs intended for that numpad arrangement.
SMD Soldering: It’s not that bad
The Red and Blue PCBs involve more soldering than just switches. They will require surface-mounted soldering (SMD) for the diodes and other components. Additionally, an Elite C will need to be soldered to the PCB, though this can be done either as surface-mounted or through-hole. I personally recommend surface-mounting the Elite C in order to reduce the number of potential points of failure.
While soldering a Jabberwocky DIY PCB may require some initial patience and a good pair of tweezers, I tried to design the assembly requirements to be less difficult than that of a typical through-hole DIY kit.
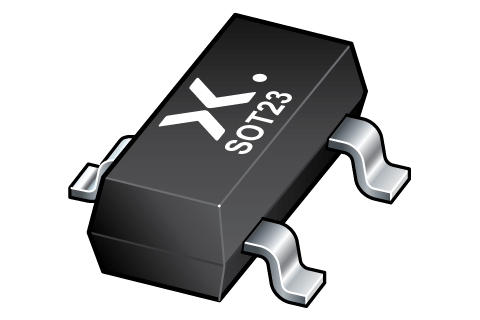
For instance, the Jabberwocky DIY PCBs use BAV70 (or BAV72) diodes, which come in a three-legged package called SOT23. BAV70s are surprisingly easy to solder. They cannot be inadvertently attached backwards (a typical problem with standard two-legged SMD diodes). Also, because they house two diodes per package, you will only need about 57 of them instead of one diode per key. I find that they’re even faster to solder than standard through-hole diodes.
The included SMD resistors are tiny, but they are also optional. They are only required if using through-hole in-switch lighting for the Caps Lock and Num Lock indicators. If these prove too difficult to solder, the PCB also provides support for through-hole resistors instead (not included).
Jabberwocky SMD Soldering Detailed Guide
I have prepared a basic guide for soldering the diodes, Elite C, resistors, and LEDs that come with the red and blue SMD PCB kits.
PCB / Plate Layout Support
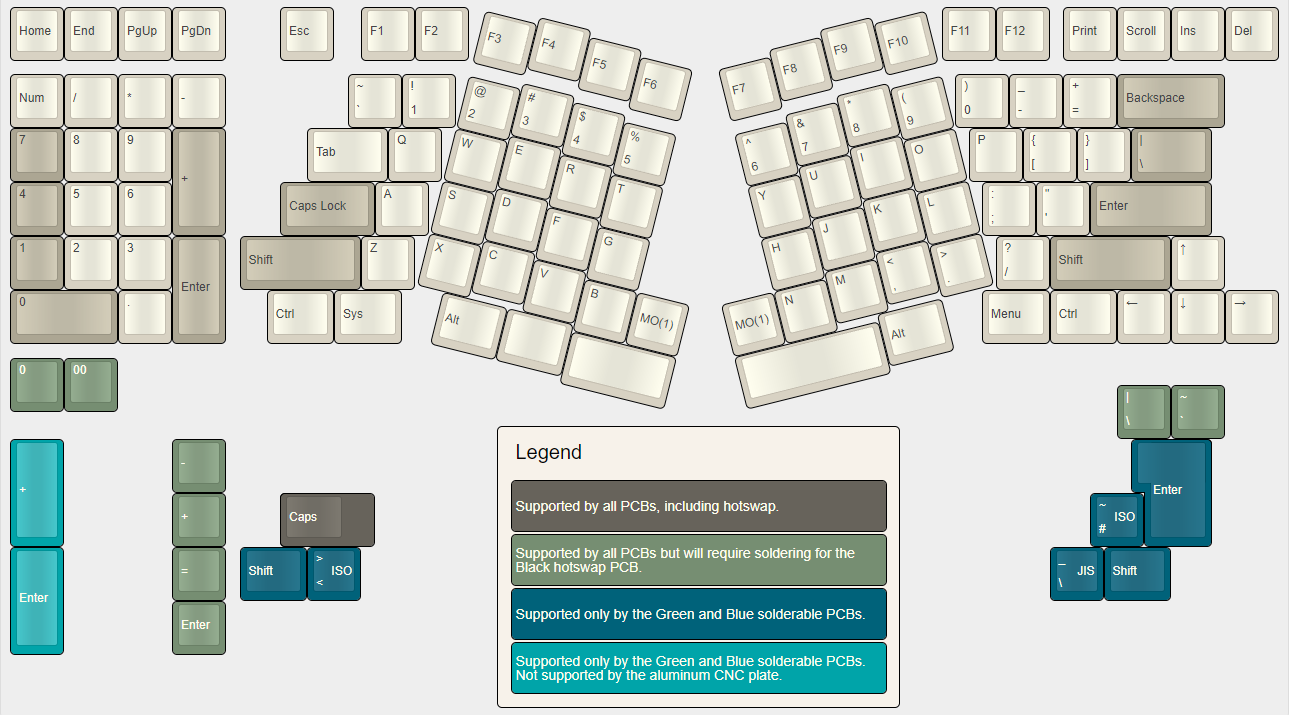

As noted in the above diagrams, the hotswap PCBs (white and black) will actually support several alternate layouts, but the individual switches for those layouts will still require soldering. These options include split backspace and split numpad mods.
ISO and JIS support are only provided on fully-soldered PCBs.
Inverted numpad layouts (with 2u vertical mods on the left side and a split zero) are available for the blue & green fully-soldered PCBs, but not all plates for the Sinister CNC edition case will support that layout.
Parts Required or Recommended
- USB Cable
- Screwdriver
- 106-112 MX switches
- MX-compatible keycaps
- 3-9x 2u-sized PCB-mounted stabilizers
- Soldering equipment & solder (unless solely using hotswap)
- Flux pen or similar (recommended for SMD assembly)
QMK Firmware
All Jabberwocky PCBs are QMK-compatible. QMK is an open-source, highly customizable firmware. The Jabberwocky firmware will be made initially available in my Github fork, with the intent of submitting it to the master QMK fork and the QMK configurator. Initially, changes to your layout will probably require compiling QMK from the command line.
QMK Branch Link
Until it is merged into the master branch, the QMK firmware for the Jabberwocky v2 can be found on the “jabberwocky-v2-clean” branch of my QMK fork.
https://github.com/nopunin10did/qmk_firmware/tree/jabberwocky-v2-clean
All Jabberwocky PCBs should come preloaded with this firmware.
VIA / VIAL
VIAL and VIA, two extensions to QMK that allow changes to one’s key layout without re-flashing the PCB, will also be supported eventually as well, though VIA might not be officially supported (and may require “developer mode” with an accompanying JSON file).
VIAL / VIA Firmware coming soon
Cross-Compatibility
All second-generation Jabberwocky PCBs are designed to use the same firmware (listed as v2 in QMK). Firmware intended for a Sinister Jabberwocky will still operate on a Dexterous Jabberwocky, and vice versa (though a UI displaying the layout may show your number pad and the keys above it on the wrong side).
Firmware Warning
Do not use the original Jabberwocky (v1) firmware in a second-generation PCB. They are not compatible. If you order a Jabberwocky in October 2022 or later, assume you will receive a second-generation PCB unless I explicitly tell you otherwise.
Elite Pi Compatibility
For those who want to experiment a bit, builders of the DIY PCBs (red or blue) may replace the Elite C with an Elite Pi instead (must be purchased separately). As the two daughterboards use different MCUs, this will require a different firmware. Doing so shouldn’t require writing new code, but it will require following Keebio’s guide to compiling the firmware from the command line.
Miscellaneous
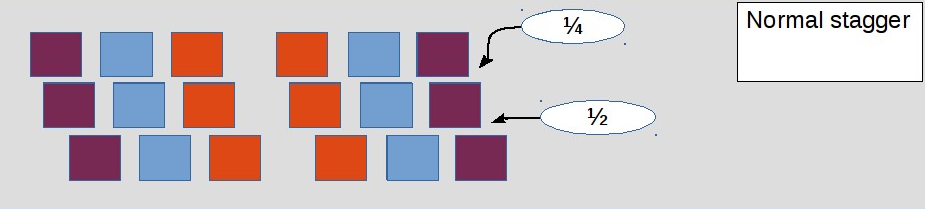
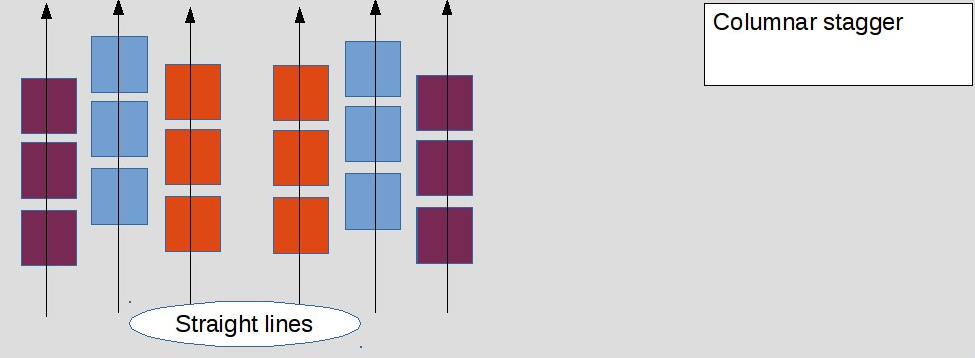
About Columnar Stagger
Traditional keyboards use a row stagger or normal stagger layout, meaning that each row of keys is offset horizontally to the right compared to the row above. The Jabberwocky arranges the majority of its alphabetical keys in a columnar stagger layout, similar to the Ergodox. This allows a finger to access all of its traditional letter assignments simply by bending straight outward or inward rather than having to twist left or right.
CNC Polycarb Palm Rest
A palm rest / wrist rest made from polycarbonate has been designed by hali to accompany the Jabberwocky Sinister CNC edition. However, I am not stocking these at this time and will instead contact buyers of the CNC edition later to see how many customers wish to order them.
Typing Test Recordings
- Typing Video on Twitch by Keebnewb, first generation FR4 skeleton case, Gateron Yellow linear switches.
- Audio clips on Soundcloud:
- FR4 skeleton, first generation with FR4 case, NK Blueberry tactile switches
- CNC edition prototype, custom bamboo plate, Kailh Box Navy clicky switches
- CNC edition prototype, custom brass plate, Zeal Clickiez clicky switches
- CNC edition prototype, FR4 plate, Tecsee Snow Globe tactile switches
- CNC edition prototype, aluminum plate, Gateron Lions & Boba Silent Tactiles
Jabberwocky Order Form
If you would like to purchase a Jabberwocky keyboard PCB or kit, please fill out the following form.
After submitting this form, I will contact you via email or Discord in the next 3-5 business days based on the availability of the products selected. You will then receive a Paypal invoice either for the full cost of the items (in-stock PCBs & DIY only) or for a refundable deposit (CNC edition only).
For international buyers, I will accept WISE instead of Paypal if you prefer to use that.


